diy hair elastic holders

diy hair elastic holders

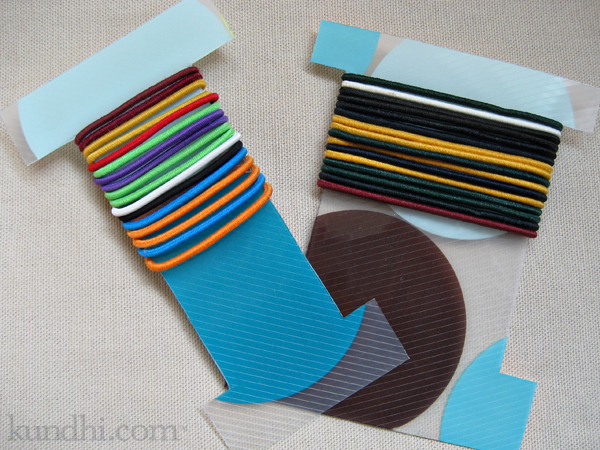
If you have long hair, how do you store your hair ties? I used to keep them on the original cardboards, but they are kind of flimsy and tear easily. I wanted something more sturdy.

Using the plastic leftover from making my place mat sock blockers, I traced the original cardboards and came up with these.

diy hair elastic holders

We’ve been using them for awhile and they are holding up great. It’s really nice to pull them out the basket and not have the elastics fall off. You could use any kind of plastic that can be cut with scissors or even the thick chipboard from a legal notepad.

embarrassing: I went to link to my place mat sock holder post and can’t find it. Did I not share them on the blog? How is that possible? Here’s the tutorial I used. I’ll have to get a pic to share with you.

how to: color your own chenille sticks

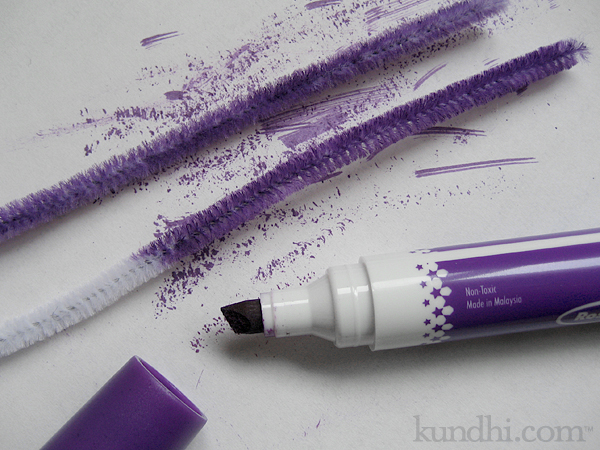
color your own chenille stick pipe cleaner

I’m not sure this is really a “how-to” or more of a crafty public service announcement. We recently had a purple pipe cleaner emergency in our house. (Does anyone else have trouble calling them chenille sticks?)

The project was a rainbow with a pot of gold. We had every color of the rainbow except purple. I suggested we go ahead and make the project and fill in the missing color later. Our Artist in Residence balked at that idea. How can you make a rainbow without purple? Details, Mama, details!

So, in an act of desperation, I grabbed a white pipe cleaner and a permanent purple marker. A Sharpie probably would have been best, but all I had was a dry erase marker. It worked remarkably well: I just colored it, waited about a minute and wiped it down with a tissue to make sure it was dry. Crisis averted!

how to fix a stuffed animal’s nose in 4 easy steps

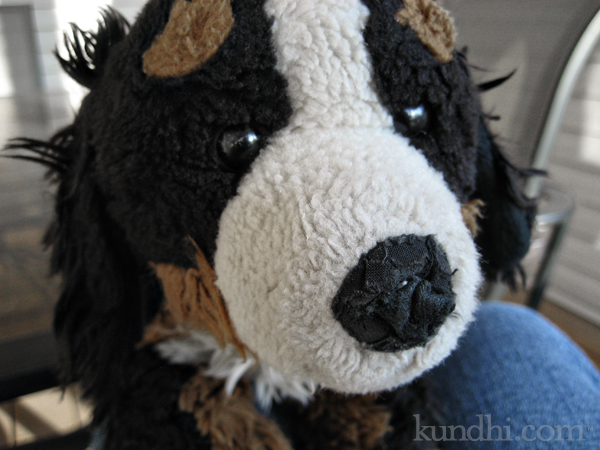
stuffed animal new nose tutorial

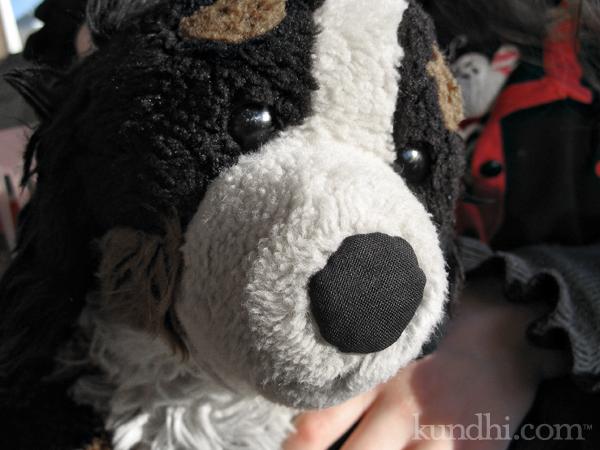
What is it with the noses on stuffed animals? I know my daughter isn’t chewing on them, so how does something like this happen? If you look closely, you can see the original torn nose and the remains of my first patch. I’m becoming an expert on fixing these, so I’m sharing my little trick with you.

Materials
fabric that matches the original nose (I doubled up for extra durability)
thin cardboard (check your recycle bin for a cereal box or similar)
iron
aluminum foil
sewing notions

Step 1
Measure the nose (I used one of these circle templates) and cut a piece of cardboard the same size and shape. Cut your fabric a little bit larger than the cardboard.

Step 2
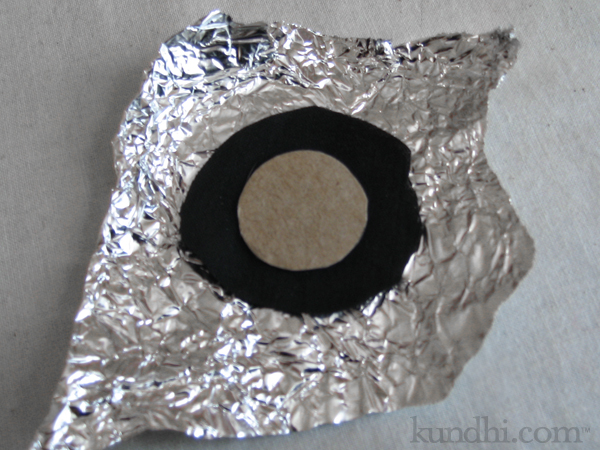
Lay down your aluminum foil, then the fabric and finally the cardboard. Fold the foil around the cardboard so the fabric is sandwiched nicely in between.

stuffed animal new nose tutorial

Step 3
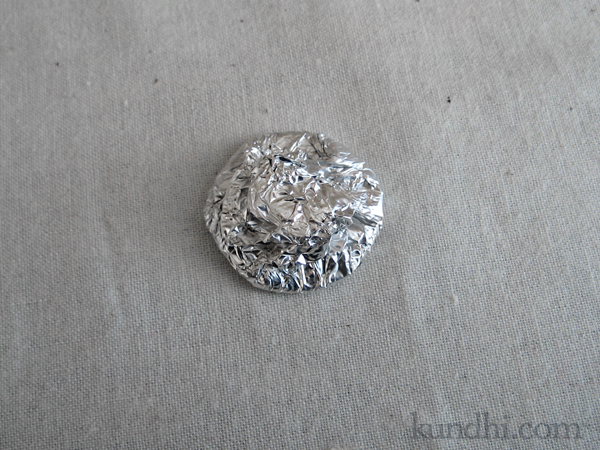
Iron the foil on the top and bottom. Press really well around the edges. Let it cool before opening it up. It will be hot!

stuffed animal new nose tutorial

Step 4
Remove your perfectly pressed nose and hand stitch it in place.

stuffed animal new nose tutorial

He looks much happier now, doesn’t he? Hopefully the two layers of fabric will hold up a little longer this time.

how to adjust the waist of your pants/jeans in 4 easy steps

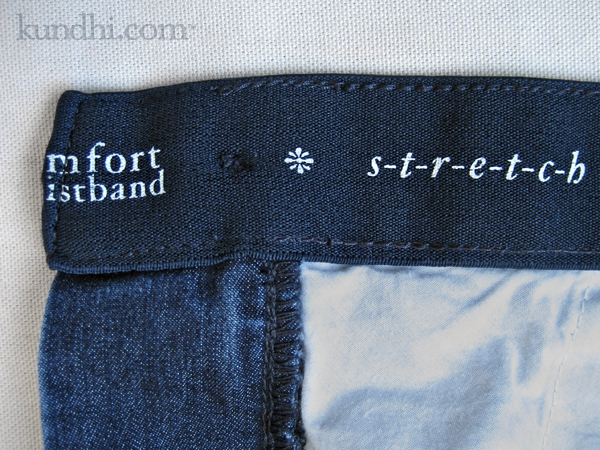
My “Finished on Friday” project this week has turned into a tutorial. I think you are going to love it. I had written a similar tutorial about a month ago complete with pictures. Something just didn’t feel right about it, though. I figured there must be an easier way to tackle this problem. Then I found a great fitting pair of jeans at the thrift store. The secret: a “comfort elastic waistband.” See how the elastic is incorporated around the entire waist?

take in pants jeans at the waist

Then my friend Amy commented on my frustrations taking in the waist on these pants. “When I have encountered that I sometimes just open the side seam in the waistband area and thread new elastic right over the old.”

Aha! Remember my adjustable elastic tutorial? This is kind of the same, but better. The elastic goes around the entire waist, so there’s no bunching up in any one place. The fabric is evenly distributed for a smoother finish.

You can even do this without a sewing machine as long as you don’t mind a little hand stitching.

take in pants jeans at the waist

Materials
3/4″ or 1″ wide elastic
small, sharp pair of scissors
Fray Check
pin, needle and thread

Step 1
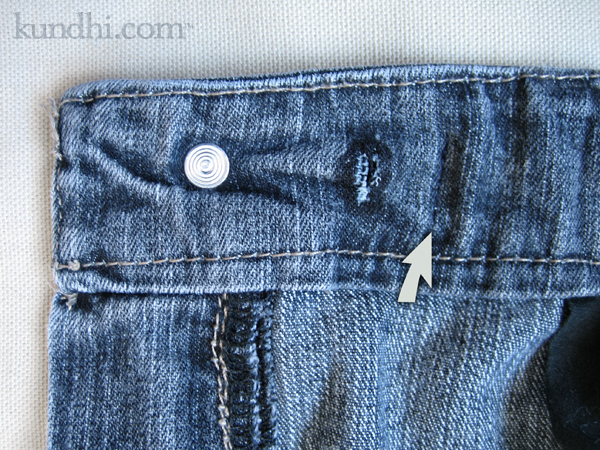
Snip two holes on either side of the waist to create a casing for the elastic — one just inside the buttonhole/snap and the other just inside the button/other snap. Make sure your scissors don’t go through to the other side! Apply Fray Check to the raw edges.

Step 2
Thread the elastic through the casing and secure with stitches on one side. (My thread matched the denim a little too well. The arrow is pointing to the stitches. If you look really close, you’ll see them.)

Step 3
Try on pants and pull on the elastic until you’ve got a good fit.

Step 4
Pin elastic in place, take off pants and secure with stitches on the other side. Trim excess elastic.

That’s it! Totally easy! You can do this to any pants that:

  • fit your hips, but are too big in the waist
  • fit everywhere except that annoying gap in the back
  • are made of denim without that 2% of spandex to make then snap back into shape after one wearing
  • need to tide you over while you lose weight and fit into the next size

how to make mini race flags in 3 easy steps

race flag tutorial

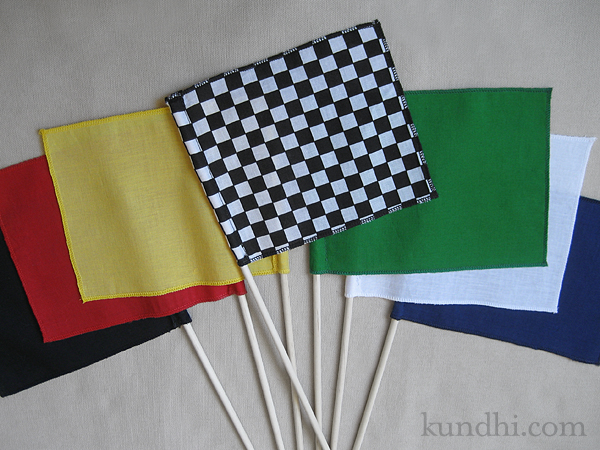
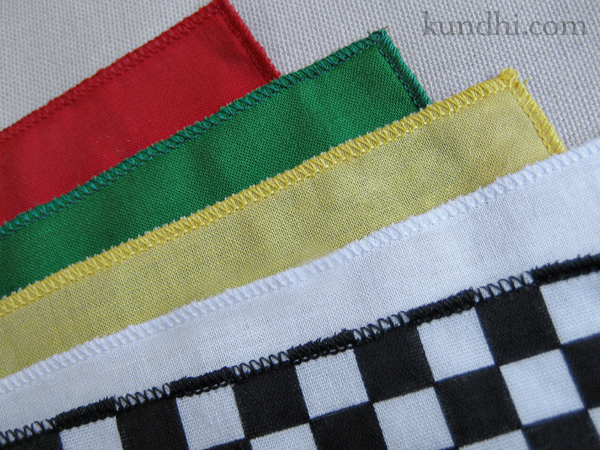
My daughter didn’t ask for many things this Christmas. I wasn’t surprised a race track was one of the few items on her list, but I wasn’t expecting a request for a set of racing flags. I figured they’d be easy to make, but they couldn’t look homemade. They were coming from Santa, after all. These would make great gifts for the little racing fans in your life — girls and boys alike.

You’ll need a serger for this project. I suggest making a few sets at once. The project itself is super easy, but changing the serger thread is a bit time consuming. It’s definitely not a last minute Christmas Eve project, ahem.

Materials
5″ x 7″ rectangles of various colored fabric (flag definitions here)
3/8″ x 12″ wood dowels
matching thread, three spools each
fray check

Notes
Thread: Those big grab bags of half-used spools of thread at the thrift store are perfect for these. You’ll need a lot of spools, but not a lot of thread.

Changing serger thread: I don’t re-thread my serger every time I change thread. Simply snip the original thread close to the spool and tie on a new spool. Then lift your presser foot to release the tensions and pull the threads through. Try not to run the knots through your tension wheels and be careful with the knot at the needle’s eye. You may have to re-thread the needle. Once new threads are through, drop your presser foot and start serging!

race flag tutorial

Step 1
Serge all four sides of each rectangle with a rolled hem.

Step 2
Fold one shorter side over 1/2″ and press. Sew the top and side closed, stitching close to the rolled hem. Leave an opening at the bottom for the dowel.

Step 3
Trim ends. Secure the serged ends with Fray Check. Slide flag onto dowel.

storage: A drawstring bag made with the checkered flag fabric would be so cute for these! A mailing tube from the office supply store also works.

confession: I bought new, same brand fat quarters of fabric for this project. It almost killed me to do so, but my daughter is really enjoying the idea of Santa this year, so I caved. Normally I would have raided my fabric stash of scraps for this project. Next time for sure!

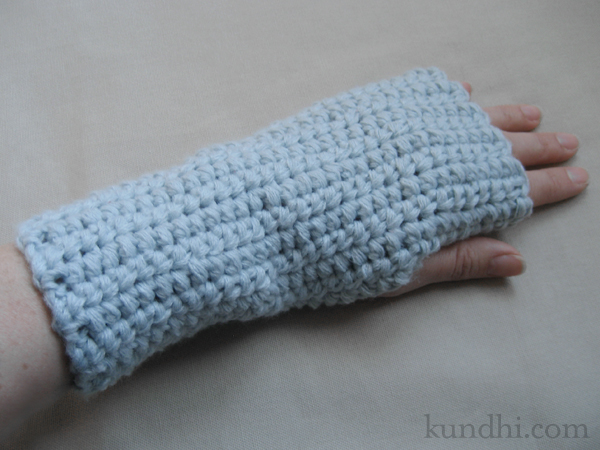
quick and easy wrist warmer pattern

wrist warmer crochet pattern

I made these wrist warmers for our mail carrier. She is awesome. We ship and receive a lot of mail packages and she always comes to our door, even in below zero temps. I know she has to keep her fingertips exposed, so I thought wrist warmers would be a nice gift.

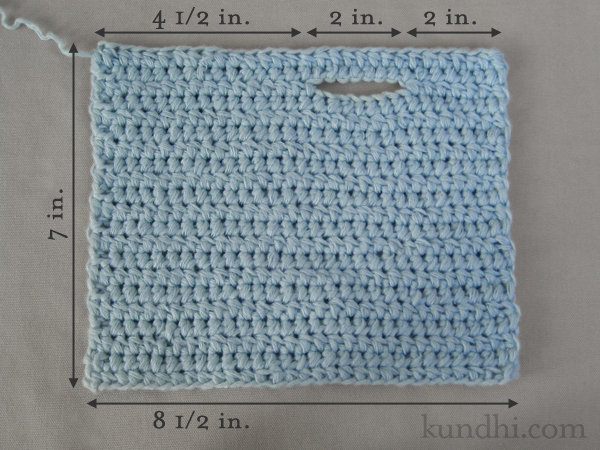
The pattern as written fits an average size woman’s wrist. If you need it bigger or smaller (for a guy or child), whip out your tape measure and adjust the measurements accordingly. I measured around my knuckles, not including my thumb, and rounded down to 7 inches for a snug fit.
wrist warmer crochet pattern

Materials
any yarn (I used bulky yarn to make the project go fast)
corresponding size hook (I used size I)

DC: double crochet
SC: single crochet

tip: I tend to make my first chain really tight no matter how hard I try to keep it loose. To compensate for this, I chain and dc my first row with a hook size larger. That keeps my edges consistent for Step 6.

Step 1
Crochet a gauge swatch in double crochet. I know some people hate making these, but it’s really not that hard, so just do it. Figure out how many stitches you have in an inch, then figure out the following:

A = gauge x 8 1/2
B = gauge x 2
C = gauge x 4

My gauge was 3 1/2 stitches per inch. I’ll put my numbers in parentheses in case you find the letters confusing.

Step 2
Chain A. (30)

Step 3
DC back and forth for six inches.

note: You’ll notice that I don’t chain at the beginning of each row. I use faux double crochets instead. They really make your edges much neater.

Step 4
Make the thumb opening: DC B (7), chain B (7), skip B (7), dc to end of the row.

Step 5
DC across, including chain stitches, and continue back and forth until piece measures 7 inches.

Step 6
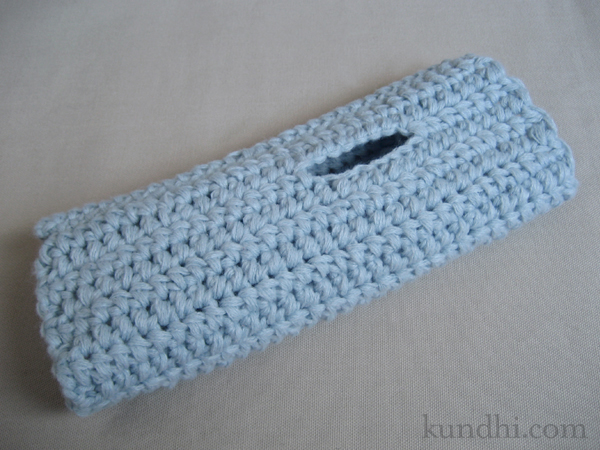
SC the last row and your first chain row together to make a tube. Cut yarn, weave ends and turn inside out.
wrist warmer crochet pattern

Step 7
Repeat for the other hand, but change Step 4 to the following:
Make the thumb opening: DC until C (14) stitches remain, chain B (7), skip B (7), DC B (7).

stash: I used recycled sweater yarn for these. It’s a soft acrylic that’s machine washable. I may need to make a pair for myself, too!
tiny crochet ornament bookmark pattern

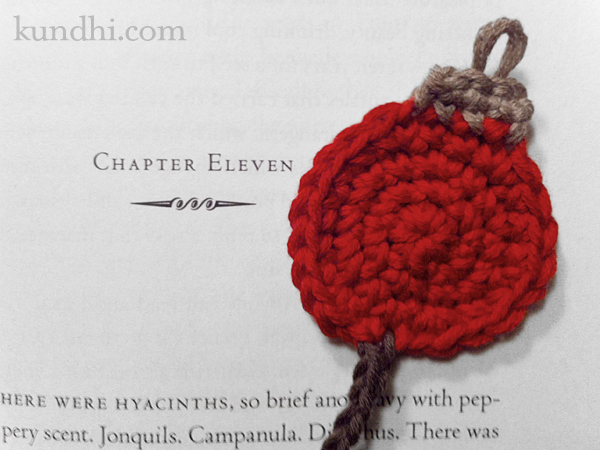
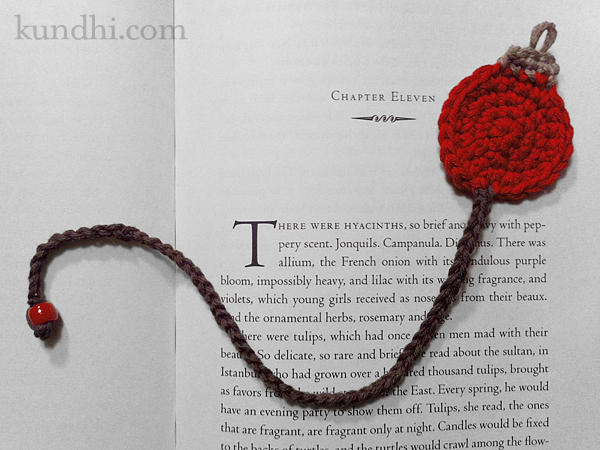
tiny ornament bookmark crochet pattern

I’m sorry my pictures aren’t the greatest for this post. The sun went down too early today. I can’t wait for the winter solstice. I just can’t get my photo-taking act together before dinnertime. I might try and retake the photos over the weekend.

This is the same pattern I used for the tiny baseball bookmarks, without the little top of course. If you want to do baseballs, I recommend marking the curves with a disappearing ink pen before embroidering the red stitches. It really helps!

tiny ornament bookmark crochet pattern

Tiny Crochet Ornament Bookmark Pattern
worsted weight yarn (I used Brown Sheep Cotton Fleece)
size F/5 (3.75mm) and D/3 (3.25mm) crochet hooks
tapestry needle for weaving ends
small bead

sl st: slip stitch
sc: single crochet
inc: 2 sc in one stitch

gauge: not important, but mine is about 1 1/2 inches wide

ornament
With larger hook, make a magic ring.
R1: 6 sc into ring
Ornament worked as a spiral. Place marker to keep track of rounds.
R2: inc in each stitch around
R3: *inc, sc* around
R4: *2 sc, inc* around until last two stitches. Sl st in last two stitches.
R5: sc in first stitch, change to smaller hook, chain 55, add bead, chain 5
Finishing: cut yarn, tie knot, thread end back through bead, tie double knot, trim close to knot.

ornament top
R1: pick up stitches at top of ornament as follows: pick up and chain 1, *pick up and sc* three times, turn work
R2: chain 1, sc 3
Finishing: cut yarn, add a little loop between middle two stitches while weaving in ends

These work up really fast and add a nice handmade touch to book gifts this holiday season. I’ve got a lot of books on my list for Santa — better make a few more just for myself. Enjoy!

stash: These only take a tiny bit of yarn. You can definitely go stash diving for this project!

tiny crochet spider pattern

crochet spider amigurumi

Thank you for the wonder feedback on my little pumpkin pattern. I’ve received the nicest comments and have been flattered by how many people have linked back to it.

When I sat down a few weeks ago to make some little crochet balls, I didn’t intend to whip up a bunch of Halloween-inspired projects, but you go where the inspiration takes you.

This spooky little spider is fast and easy to make. You still have plenty of time to crochet one (or a few) before October 31st. Have fun!

Spider Legs (make eight)
These are just like the pumpkin stem, only longer.
R1: chain 12
R2: sc in second bump from hook, sc in next ten bumps*

Spider Body
Crochet Rows 1-11 of Tiny Crochet Ball with black yarn.

Before stuffing, attach or embroider eyes. Then attach legs, four on each side. Bury ends inside body.

Stuff and finish off with Row 12.

*Go into the bumps on the back of the chain, not the stitches on the front of the chain.

pattern: tiny crochet pumpkin

crochet pumpkin amigurumi

On Monday I mentioned that I had been playing around with variations on the Tiny Crochet Ball pattern. Hmmm… it’s October. Is it any surprise that I’m making pumpkins? Here’s how you can, too.

Using Tiny Crochet Ball pattern:

Pumpkin
Magic ring, R1-2: brown yarn
R3-R11: orange yarn
R12: brown yarn

Stem
R1: using brown yarn, chain 5
R2: sc in second bump from hook, sc in next three bumps*

Finishing
Break yarn and tie a knot. Using a darning needle, attach the stem at the top and bring the ends down through the bottom. Squinch the ball until it’s pumpkin shaped and tie a knot to hold the shape. Bury the ends inside the pumpkin.

*Go into the bumps on the back of the chain, not the stitches on the front of the chain.

Enjoy!

tiny crochet ball pattern

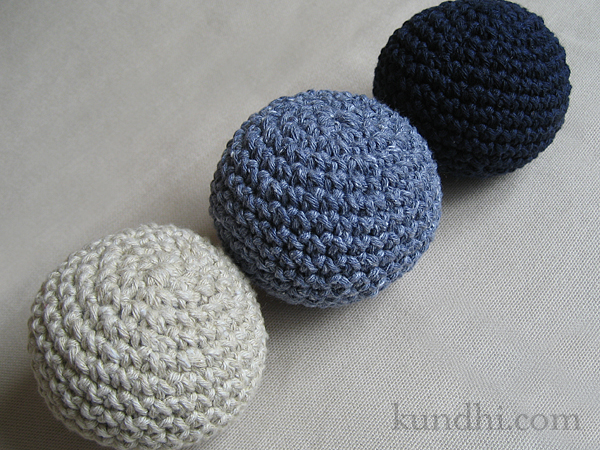
tiny crochet ball pattern

It took a few tries until I was satisfied with this pattern. At first, they were coming out too hexagon shaped, so I decided to alternate the increase/decrease placement every other row. That gives the ball a more round shape.

I also wasn’t happy with the gaps that the decreases made, especially on the navy ball. You could see the white stuffing! Then I remembered this invisible decrease from Planet June. Problem solved!

Have fun with this one. On Friday I’ll show you a little variation. Stay tuned!

Tiny Crochet Ball Pattern
worsted weight yarn (I used Aunt Lydia’s cotton)
size G/6 (4.25mm) crochet hook
polyfil for stuffing
tapestry needle for weaving ends

sc: single crochet
inc: 2 sc in one stitch
dec: 1 sc over two stitches through the front loops only

gauge: not important, but mine are about 2 1/2 inches wide

Make a magic ring.
R1: 6 sc into ring
Ball worked as a spiral. Place marker to keep track of rounds.
R2: inc in each stitch around
R3: *inc, sc* around
R4: *2 sc, inc* around
R5: *inc, 3 sc* around
R6: *4 sc, inc* around
R7-11: sc around
R12: *dec, 4 sc* around
R13: *3 sc, dec* around
R14: *dec, 2 sc* around
R15: *1 sc, dec* around
Stuff with polyfil
R16: dec around