how to sew a baby quilt in five easy steps

snoopy baby quilt

So you’d like to make a quilt, but you’re intimidated by all of those little pieces, right? I am, too. But you can make a quilt without blocks. It’s easy and looks just as nice! Here’s how I did it:

Materials
1 – 36×36″ piece of top fabric
1 – 36×36″ piece of bottom fabric
1 – 36×36″ piece of batting
1 – 38×8″ piece for making the trim*
matching thread
bias tape tool
rotary cutter and ruler
walking foot (optional)

*even easier: use 4 yards (plus a few inches) of pre-made bias tape

Step 1
Lay your fabric on the floor wrong sides together with the batting in the middle. Pin baste from the center outward.

Step 2
Starting from the center and working your way outward, draw parallel lines every four inches with sewing chalk, water soluble pen or light pencil.

Step 3
Starting from the center, sew along these lines working your way outward, taking out the basting pins as you go. Here’s where a walking foot is helpful, but if your batting isn’t too thick, you should be fine without it. Square up your edges with a rotary cutter and ruler.

Step 4
Cut your trim fabric according to the measurements for your bias tape tool and make the trim. Even easier: open the package of pre-made bias tape.

Step 5
Fold the trim over the edge and attach with a zig zag stitch. Fold the ends over at the corners to enclose the raw edges.

snoopy baby quilt

I hope I didn’t oversimplify this, but it’s really easy. The zig zag trim takes a little practice. This was my first time, and I’m sure it will get a lot neater the more I do it.

resource: I was inspired by Soule Mama’s Beach Blanket To-go for this blanket. One day I hope to make something as beautiful as her daughter’s quilt, but for now, I’m going to stick with single pieces of fabric until I’ve got more free time.
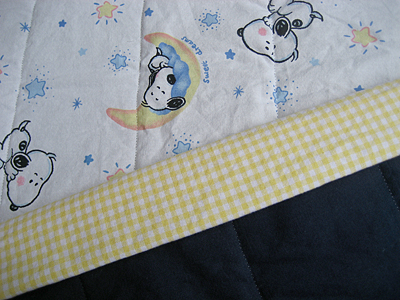
sleeping snoopy baby quilt

sleeping snoopy baby quilt

Every time I turn around it seems like someone else is having a baby. I love crafting for babies. This quilt is almost finished. All I need to do is attach the binding. I bought a lot of this fabric off of ebay awhile ago. You might be thinking, “That looks familiar!” The first quilt I made was backed with fleece. This one is backed with navy cotton. (It’s really not that dark, but I don’t have much sun for taking pictures today.) I only have a little bit of the binding fabric, but it should be just enough.

Update on birthday crafting: The knitted gift is finished. The embroidery tea towels are almost done. These are going much better than my experiment with cross stitch. I’m using a simple split stitch and loving it. I can’t wait until I can post pictures!

stash: So far I’ve used stash yarn, embroidery thread, fabric and batting for all of my projects. Having everything at my fingertips really makes all of the thrifting and garage sale-ing I did earlier in the year worth it!

birthday crafting

Last Friday was Brady’s birthday, and in keeping with my pledge, he received some handmade goodies from us. I had made him some Peanuts bibs for Christmas (which I forgot to take a picture of for the blog — you can see one in action here) and I decided to stay with that theme.

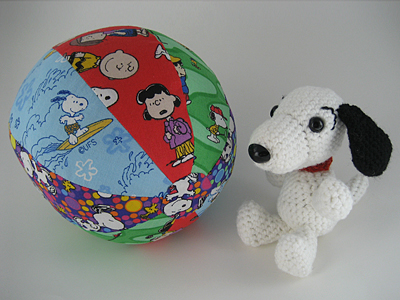
snoopy and ball

The ball is a pattern from the Purl Bee and was really fun to make. I used some leftover fabric from the bibs. I think I’m going to do the same for M with the leftovers from her bibs. She really liked it!

Snoopy is a pattern from Chibi Ami. I found it on ravelry. I think you can find a pattern for pretty much anything on ravelry!

It’s a great feeling to watch someone enjoy a present that you made by hand. Brady had a huge smile on his face when he pulled the ball out of the bag, and when we left, he was chewing on Snoopy’s ear. I’m pretty sure that’s a universal sign of toddler approval.

………………..

Shop update: more felted heart coffee sleeves are up in my etsy store.