pattern: crochet troll doll dress

I’ve had this little troll for almost 20 years. She’s worn a Tae Kwon Do uniform for most of that time. I’m not sure exactly when my daughter decided the troll was hers. Isn’t it funny how kids kind of take over your things without you realizing it?

troll dress crochet pattern

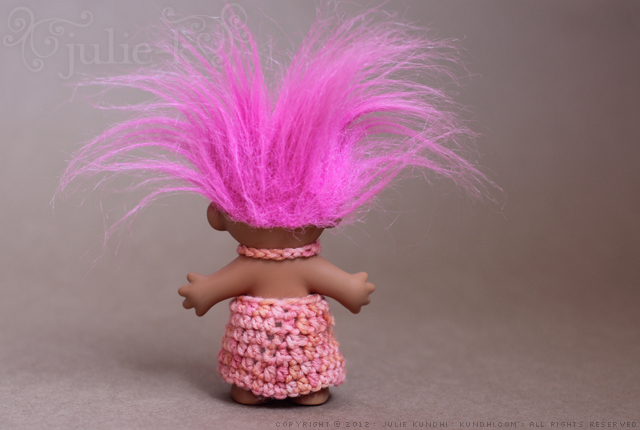
The other night my daughter announced that she was naming the troll Isabel. Apparently, Isabel has grown tired of her Tae Kwon Do uniform and asked for a dress. Could I make one?

I thought there might be some other trolls out there who’d like a dress, so I’m sharing the pattern. It may seem big while you are making it, but remember it has to fit over those cute, chubby feet.

Pattern is written for the four-inch size troll doll.

Materials
sport or dk weight yarn (yarn was from my stash and is 12 wpi)
size F/5 (3.75 mm) crochet hook
small button
needle and thread for sewing button
tapestry needle for weaving ends

gauge: 4 stitches per inch

ch: chain
hdc: half double crochet
hdcDecrease: half double crochet decrease
sl st: slip stitch

half double crochet decrease: yarn over, hook through stitch, yarn over, pull through stitch, yarn over again, hook through next stitch, yarn over, pull through stitch, yarn over one more time, pull through all five loops

  • ch 32, join with sl st in back loop* of first chain to make a circle
  • ch 2, skip next stitch, hdc around in back loops* of chain, join in the round with a sl st in the top chain – 32 stitches
  • ch 2, skip next stitch, [hdc 6, hdcDecrease] around, join in the round with a sl st in the top chain – 28 stitches
  • ch 2, skip next stitch, [hdc 5, hdcDecrease] around, join in the round with a sl st in the top chain – 24 stitches
  • ch 2, skip next stitch, [hdc 4, hdcDecrease] around, join in the round with a sl st in the top chain, break yarn – 20 stitches
  • find the front six stitches of the dress, join yarn, chain 2, hdc next five stitches, turn work
  • ch 2, hdc next five stitches, do not break yarn
  • sew on the button and put the dress on the troll
troll dress crochet pattern

The next step depends on how tightly you chain and the size of your button. Chain 20 stitches or however many you need to make the strap go from one side, around the back of the neck, to the front and around the button. Break yarn and use the tapestry needle to thread the end a few stitches back to make the button loop.

Weave in ends.

*Go into the bumps on the back of the chain, not the stitches on the front of the chain.
quick and easy wrist warmer pattern

wrist warmer crochet pattern

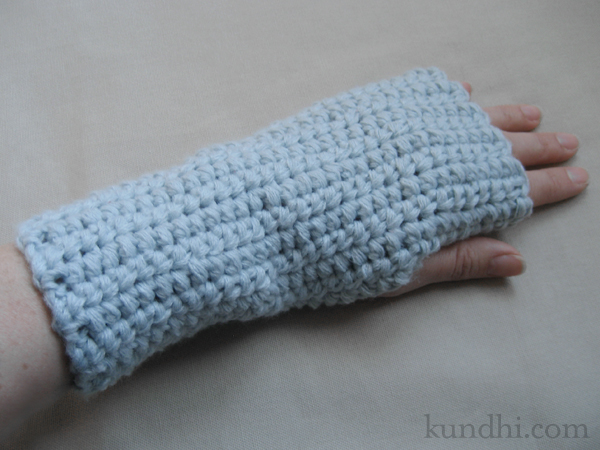
I made these wrist warmers for our mail carrier. She is awesome. We ship and receive a lot of mail packages and she always comes to our door, even in below zero temps. I know she has to keep her fingertips exposed, so I thought wrist warmers would be a nice gift.

The pattern as written fits an average size woman’s wrist. If you need it bigger or smaller (for a guy or child), whip out your tape measure and adjust the measurements accordingly. I measured around my knuckles, not including my thumb, and rounded down to 7 inches for a snug fit.

wrist warmer crochet pattern

Materials
any yarn (I used bulky yarn to make the project go fast)
corresponding size hook (I used size I)

DC: double crochet
SC: single crochet

tip: I tend to make my first chain really tight no matter how hard I try to keep it loose. To compensate for this, I chain and dc my first row with a hook size larger. That keeps my edges consistent for Step 6.

Step 1
Crochet a gauge swatch in double crochet. I know some people hate making these, but it’s really not that hard, so just do it. Figure out how many stitches you have in an inch, then figure out the following:

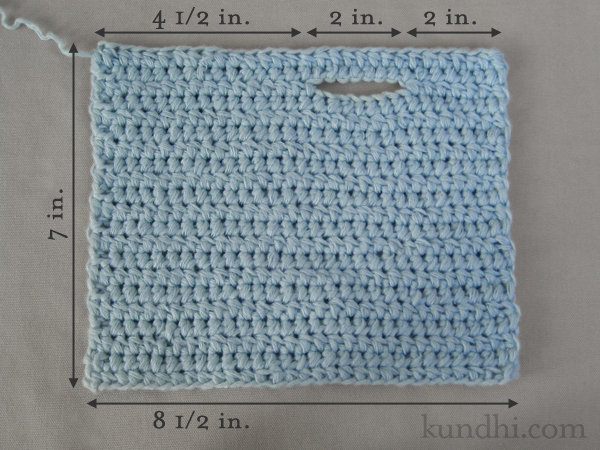
A = gauge x 8 1/2
B = gauge x 2
C = gauge x 4

My gauge was 3 1/2 stitches per inch. I’ll put my numbers in parentheses in case you find the letters confusing.

Step 2
Chain A. (30)

Step 3
DC back and forth for six inches.

note: You’ll notice that I don’t chain at the beginning of each row. I use faux double crochets instead. They really make your edges much neater.

Step 4
Make the thumb opening: DC B (7), chain B (7), skip B (7), dc to end of the row.

Step 5
DC across, including chain stitches, and continue back and forth until piece measures 7 inches.

Step 6
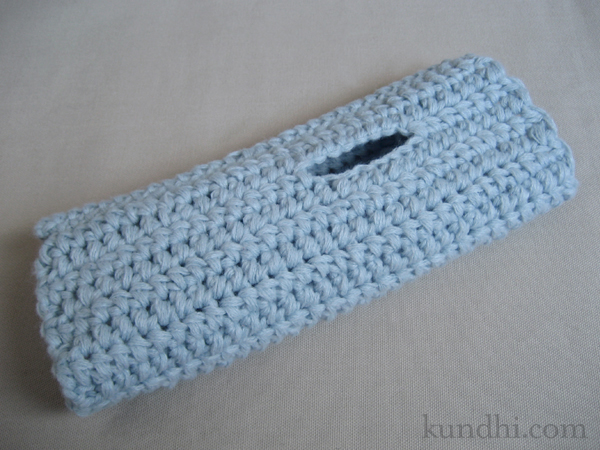
SC the last row and your first chain row together to make a tube. Cut yarn, weave ends and turn inside out.

wrist warmer crochet pattern

Step 7
Repeat for the other hand, but change Step 4 to the following:
Make the thumb opening: DC until C (14) stitches remain, chain B (7), skip B (7), DC B (7).

stash: I used recycled sweater yarn for these. It’s a soft acrylic that’s machine washable. I may need to make a pair for myself, too!

pattern: tiny crochet pumpkin

crochet pumpkin amigurumi

On Monday I mentioned that I had been playing around with variations on the Tiny Crochet Ball pattern. Hmmm… it’s October. Is it any surprise that I’m making pumpkins? Here’s how you can, too.

Using Tiny Crochet Ball pattern:

Pumpkin
Magic ring, R1-2: brown yarn
R3-R11: orange yarn
R12: brown yarn

Stem
R1: using brown yarn, chain 5
R2: sc in second bump from hook, sc in next three bumps*

Finishing
Break yarn and tie a knot. Using a darning needle, attach the stem at the top and bring the ends down through the bottom. Squinch the ball until it’s pumpkin shaped and tie a knot to hold the shape. Bury the ends inside the pumpkin.

*Go into the bumps on the back of the chain, not the stitches on the front of the chain.
Enjoy!

tiny crochet ball pattern

tiny crochet ball pattern

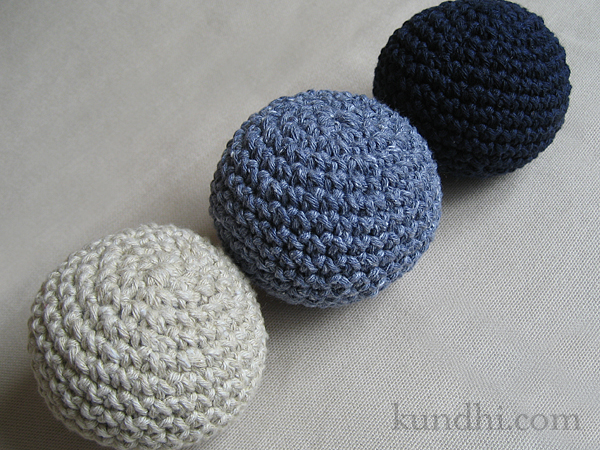
It took a few tries until I was satisfied with this pattern. At first, they were coming out too hexagon shaped, so I decided to alternate the increase/decrease placement every other row. That gives the ball a more round shape.

I also wasn’t happy with the gaps that the decreases made, especially on the navy ball. You could see the white stuffing! Then I remembered this invisible decrease from Planet June. Problem solved!

Have fun with this one. On Friday I’ll show you a little variation. Stay tuned!

Tiny Crochet Ball Pattern
worsted weight yarn (I used Aunt Lydia’s cotton)
size G/6 (4.25mm) crochet hook
polyfil for stuffing
tapestry needle for weaving ends

sc: single crochet
inc: 2 sc in one stitch
dec: 1 sc over two stitches through the front loops only

gauge: not important, but mine are about 2 1/2 inches wide

Make a magic ring.
R1: 6 sc into ring
Ball worked as a spiral. Place marker to keep track of rounds.
R2: inc in each stitch around
R3: *inc, sc* around
R4: *2 sc, inc* around
R5: *inc, 3 sc* around
R6: *4 sc, inc* around
R7-11: sc around
R12: *dec, 4 sc* around
R13: *3 sc, dec* around
R14: *dec, 2 sc* around
R15: *1 sc, dec* around
Stuff with polyfil
R16: dec around

the perfect pants pattern!

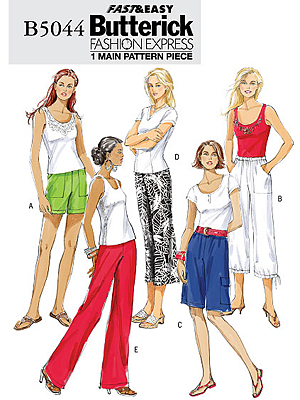
butterick pants pattern

In addition to the perfect t-shirt, I’m also trying to find the perfect lounge pants. I know it’s hard with elastic waistbands — the fabric always seems to bunch up in the front when you sit down — but I would like to minimize the amount of bunching!

Remember these pajamas? They are from Simplicity 3935. I’m pretty sure I made them a size too big, but even still, they’re kind of baggy around the tummy. I’m hoping to give them a little makeover soon.

Next are the lounge pants from Sewing Green. I love these pants, especially the little curve in the leg and the small boot cut flare. I was so excited to make a muslin and so disappointed when they didn’t work out. Great pattern, just not the right pattern for me.

Just as I was about to give up, I was looking around online and found an easy straight leg pattern — a style that works well for me. Better yet, Hancock was having a 99 cent pattern sale over the weekend. I drove up Saturday and purchased it on the spot. Success! Finally!

Now I’m planning an assembly line of production. I’ve been squirreling away thrifted sheets for jammies. I’ve also got some thrifted pants that I’ve been dying to refashion. They’re the real reason I wanted to find a non-bunchy pattern. I’d like to actually wear them outside of the house!

sales: Have you ever paid full price for a pattern? Whenever I find something I like, I stalk the fabric store flyers until 99 cent pattern day. Such a bargain!

wardrobe refashion: another t-shirt

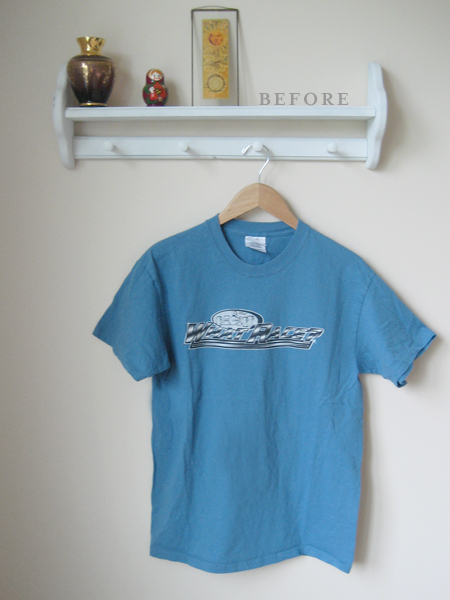
I have not abandoned my dream of many refashioned t-shirts. On a recent 99 cent thrifting spree I found my favorite style t-shirt in my size. Luckily the color didn’t look that great on me, so I took it apart to make a master pattern.

t-shirt pattern pieces

I’ll admit I was feeling a little over-confident when I tried this refashion. Here are a few things I need to pay attention to going forward.

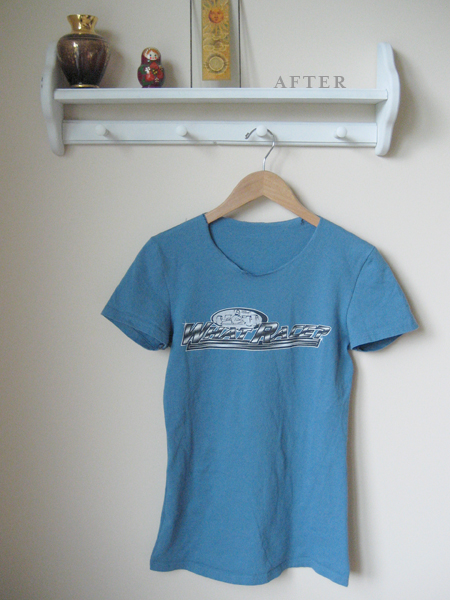
  • Check the fabric! The original shirt is a 1×1 rib, the refashioned shirt is plain knit and has a lot less ease.
  • Make a paper pattern! No matter how hard you try, knit fabric is not easy to trace.
  • Err on the side of too big! Just a tiny bit extra seam allowance would have saved this project.

bmw corral shirt

Honestly, it turned out pretty darn good. I was most worried about the sleeves and shoulders and they are just fine. It’s the rest of the body that’s a little tight. Too bad I didn’t baste and try it on before serging the edges. Doh!

bmw corral shirt

stash: Sadly, I really did like this t-shirt. It’s from one of the worst Formula One races I ever attended. (The front reads “What Race?”) Ha! Guess it’s destined to be a tote bag now.

tiny striped egg pattern

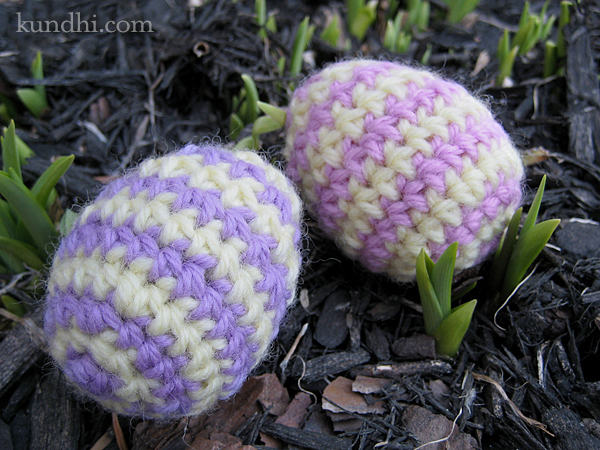
tiny crochet striped easter eggs

So here it is! After many eggs, I finally found the right hook/yarn combination that feels right. My first egg used a larger hook and Red Heart yarn. It was too big and looked a little lumpy. I finally settled on Plymouth Galway wool with a smaller hook. Both are labeled worsted weight, but the wool eggs seem less lumpy. Also, I decided on hdc instead of sc because I liked the width of the stripe better. I’m posting this in Ravelry. I can’t wait to see everyone’s eggs!

Tiny Striped Egg
worsted weight yarn
size D/3 (3.25mm) crochet hook
polyfil for stuffing
tapestry needle for weaving ends

ch: chain
hdc: half double crochet
hdcIncrease: half double crochet increase
hdcDecrease: half double crochet decrease
sl st: slip stitch

half double crochet increase: hdc twice in same stitch
half double crochet decrease: yarn over, hook through stitch, yarn over, pull through stitch, yarn over again, hook through next stitch, yarn over, pull through stitch, yarn over one more time, pull through all five loops

I carry the yarn up the inside with out breaking it for each stripe. Change colors at the slip stitch: hook through stitch, yarn over with new color, pull new yarn through stitch.

gauge: not important, but mine are about 1 1/2 x 2 1/4 inches finished

P=purple stripe, Y=yellow stripe

  • Make a magic ring.
  • R1 P: ch 2, hdc into loop 5 times, pull loop closed, join with sl st into second ch – 6 sts
  • R2 Y: ch 2, hdc in same st, hdcIncrease around, sl st into second ch – 12 sts
  • R3 P: ch 2, hdc in same st, hdc in next st, *hdcInc, hdc* around, sl st into second ch – 18 sts
  • R4 Y: ch 2, hdc in same st, hdc in next 2 sts, *hdcInc, hdc, hdc* around, sl st into second ch – 24 sts
  • R5 P: ch 2, hdc around, sl st into second chain – 24 sts
  • R6 Y: repeat R5
  • R7 P: ch 2, hdc, hdcDecrease, *hdc, hdc, hdcDecrease* around, sl st into second ch – 18 sts
  • R8 Y: ch 2, hdc around, sl st into second chain – 18 sts
  • R9 P: ch 2, hdcDecrease, *hdc, hdcDecrease* around, sl st into second ch – 12 sts
  • R8 Y: ch 2, hdc around, sl st into second chain – 12 sts
  • Stuff with polyfil
  • R10: hdcDecrease around, close up with tail, tie off both colors, bury ends inside with tapestry needle

tiny four-leaf clover pattern

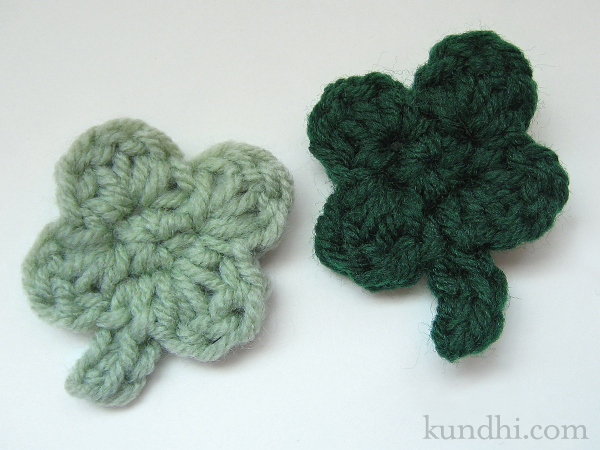
tiny crochet shamrock

I had this idea. The top of my tiny crochet hearts kind of look like half of a four-leaf clover. What if I added two more leaves and a stem?

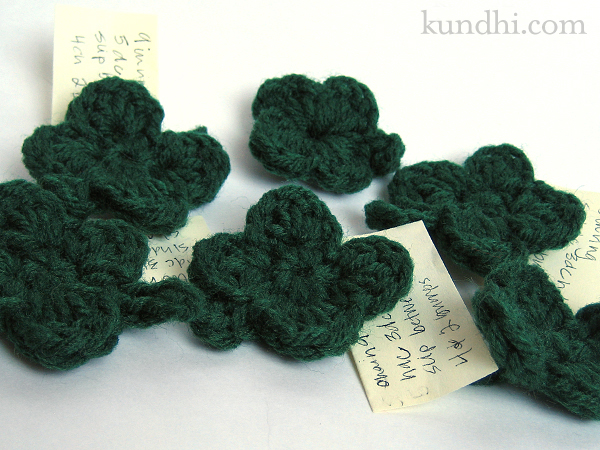
tiny crochet shamrock

After a few tries, I finally got it. Hope they bring you some good luck!

Tiny Four-Leaf Clover Pattern
worsted weight yarn
size G/5 (4.25mm) crochet hook
tapestry needle for weaving ends

dc: double crochet
hdc: half double crochet
sc: single crochet
sl st: slip stitch

gauge: not important, but mine are about 1 1/2 inches across

Make a magic ring.
R1: chain 1, sc into loop 5 times, pull loop closed, join with sl st (5 stitches)
R2: It might be easier to take this stitch by stitch:
— chain 1, hdc, 3dc, hdc in first stitch
— sl st into second stitch, hdc, 3dc, hdc in that same stitch
— sl st into third stitch, chain 4, sc in second and third bump from hook,
    sl st into third st again*
— hdc, 3dc, hdc in fourth stitch
— sl st into fifth stitch, hdc, 3dc, hdc in that same stitch
— sl st into first chain 1

*You’re going into the bumps on the back of the chain, not the stitches on the front of the chain.
Some folks were having trouble getting the V shape on the top of the heart, so I hope adding this chain 1 helps. I take the end, weave it in on the back toward the tail and then tie them tightly together.

my first skirt from measurements

embroidered eyelet baby quilt

A few months ago I checked out Sew What! Skirts from the library. The book just clicked with me. The instructions made sense and seemed really easy. I decided to buy the book and spent months reading and looking at the pictures even though I didn’t have time to make anything.

This weekend I’ve got a dinner date and decided it was time to try one out. I made an a-line with elastic waist pattern, but didn’t have enough fabric to make it as swoopy as I would have liked. It’s more of a straight skirt with a little flair, but it fits, looks cute, and was super easy! I think 2010 is going to be the year of the skirt.

stash: The fabric came in a bin that I bought from a UNL fashion graduate. He said all of the fabrics were really nice and expensive (from New York!), but how was I to know? They weren’t labeled or anything. It’s got a nice drape, and at $5 for the entire bin, the price was right!

easy backpack with bias tape straps

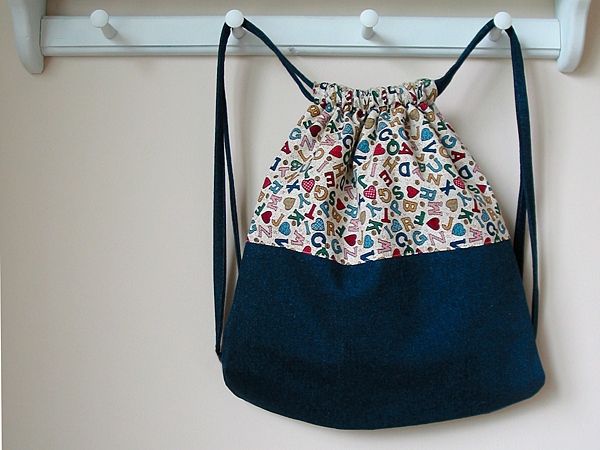
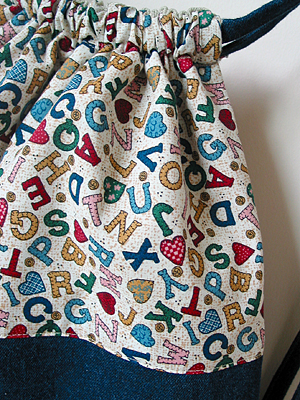
My daughter starts preschool next week and she needed a backpack. I asked her if she’d like me to make one for her and she said YES!

I let her choose fabric from my stash and helped her with coordinating the colors. I really like how it turned out and she loves it. My only problem is getting her to wear it. Right now, she just wants to carry it by the straps.

martha stewart easy beach bag

I used Martha’s Easy Beach Bag pattern with a few modifications:
• inside is canvas instead of nylon
• inside has two pockets
• used fabric instead of cord for the straps
• serged the raw edges inside

drawstring back pack with lining

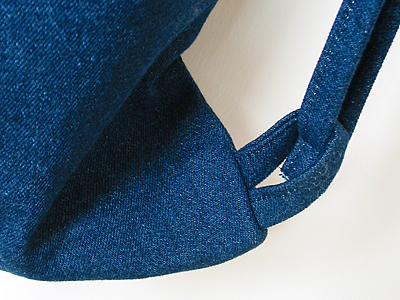
Drawstring Strap How-to:
Feed strips of denim through a 1-inch bias tape maker, fold the tape in half and stitch it together. Once threaded through the loops, sew the ends together because they’ll be too thick to knot.

drawstring back pack with lining

stash: This is one of those occasions that I love having a stash of fabric. It’s so easy to dive right into a project when the motivation strikes! Plus, using a thrifty stash is so affordable. I’m guessing this cost less than $2 to make. Sweet!