easy kids bike shorts pattern

wardrobe refashion

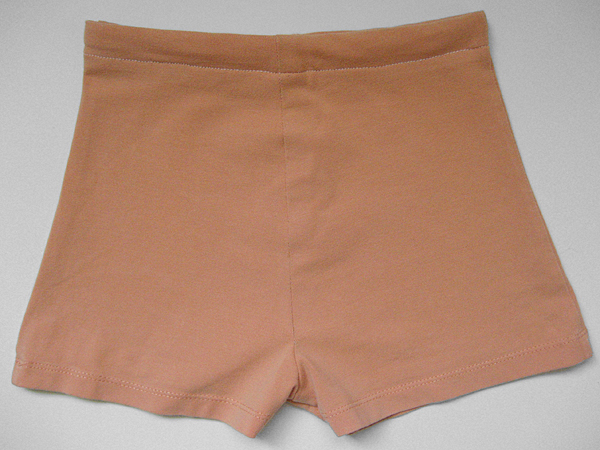
The bike shorts pattern is finished and ready for download! It’s been over two years since my original Easy Kids Shorts pattern and I do a few things differently now.

  • These days I sew the inseams first, then the rise.
  • I almost always use a 1/4 inch seam allowance instead of 1/2 or 5/8 inch, usually because I’m trying to squeeze as much as I can out of a piece of fabric or t-shirt.
  • 3/4 inch elastic seems to be more comfortable around the waist than the smaller widths.
  • Now that I have a serger, I finish my raw edges and just fold the waist over once. You can finish your edges with a zig zag/overlock edge or adjust the pattern to accommodate the double fold waist.

I recommend you pay attention to the type of knit fabric you use. The original piece I traced for this pattern was a tightly-knit jersey. The t-shirt I used was a loosely-knit jersey and the shorts turned out a little big. Not big enough to re-sew, but definitely roomier.

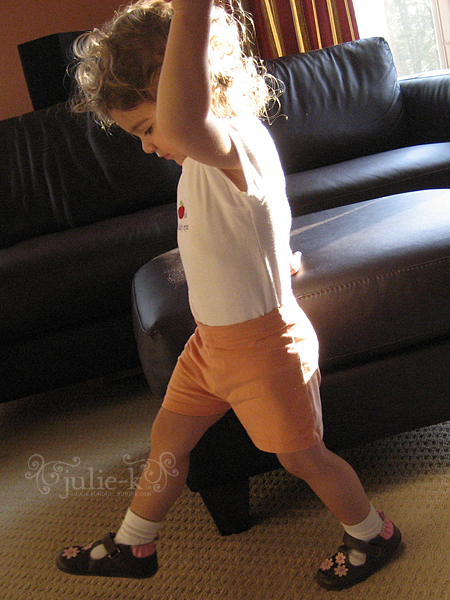
Finally, my daughter is long and lean: 20 inch waist and 14 inches from waist to knee. Adjust seam allowances and elastic size to get a better fit for your child. Want them shorter? Trim off the bottom of the pattern an inch or two.

Please leave any questions in the comments. Download the pattern here. Enjoy!
wardrobe refashion: t-shirt to bike shorts

wardrobe refashion

My daughter loves wearing dresses. She also loves to climb tall jungle gyms and roll around in the grass with her feet in the air. She understands the concept of modesty, but she’s too busy running, jumping and playing to be worried about such things right now. I get it. I want her to have fun and not be self conscious. So the new rule: bike shorts under dresses.

A few years ago, I posted a pattern for easy kids shorts. I followed the same basic steps to come up with the bike short pattern. I had also planned to share the template with you, but it’s gone missing. Whoops!

I have a few more to make, so I guess I’ll be redrawing the pattern. I’ll let you know when it’s posted. In the meantime, I’ll be outside teaching my daughter how to do cartwheels.

stash: One of my t-shirts rescued from the donation bag. Thrifted elastic.

A seriously fast, easy and inexpensive project. Plus, they go under a dress, so they don’t have to be perfect!

quick and easy wrist warmer pattern

wrist warmer crochet pattern

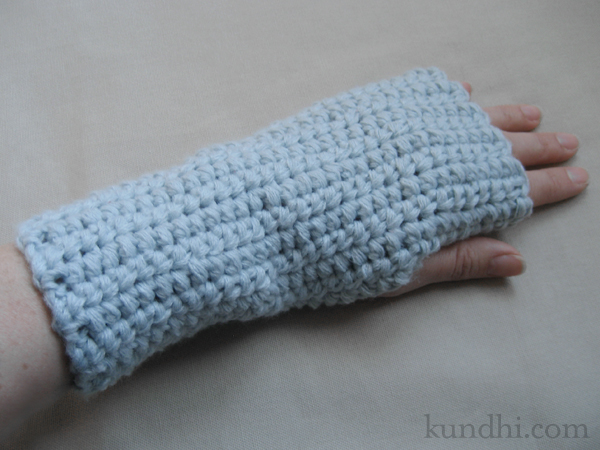
I made these wrist warmers for our mail carrier. She is awesome. We ship and receive a lot of mail packages and she always comes to our door, even in below zero temps. I know she has to keep her fingertips exposed, so I thought wrist warmers would be a nice gift.

The pattern as written fits an average size woman’s wrist. If you need it bigger or smaller (for a guy or child), whip out your tape measure and adjust the measurements accordingly. I measured around my knuckles, not including my thumb, and rounded down to 7 inches for a snug fit.

wrist warmer crochet pattern

Materials
any yarn (I used bulky yarn to make the project go fast)
corresponding size hook (I used size I)

DC: double crochet
SC: single crochet

tip: I tend to make my first chain really tight no matter how hard I try to keep it loose. To compensate for this, I chain and dc my first row with a hook size larger. That keeps my edges consistent for Step 6.

Step 1
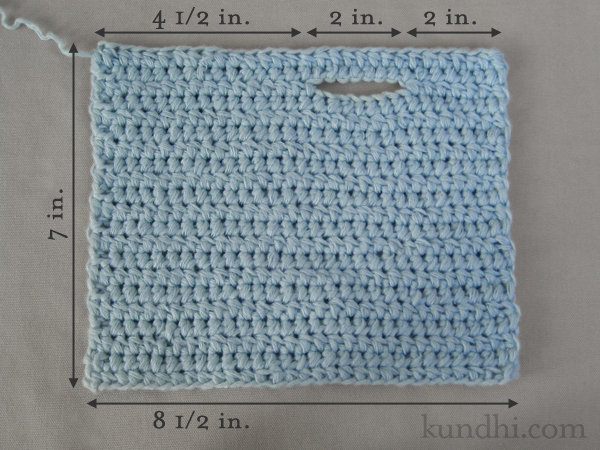
Crochet a gauge swatch in double crochet. I know some people hate making these, but it’s really not that hard, so just do it. Figure out how many stitches you have in an inch, then figure out the following:

A = gauge x 8 1/2
B = gauge x 2
C = gauge x 4

My gauge was 3 1/2 stitches per inch. I’ll put my numbers in parentheses in case you find the letters confusing.

Step 2
Chain A. (30)

Step 3
DC back and forth for six inches.

note: You’ll notice that I don’t chain at the beginning of each row. I use faux double crochets instead. They really make your edges much neater.

Step 4
Make the thumb opening: DC B (7), chain B (7), skip B (7), dc to end of the row.

Step 5
DC across, including chain stitches, and continue back and forth until piece measures 7 inches.

Step 6
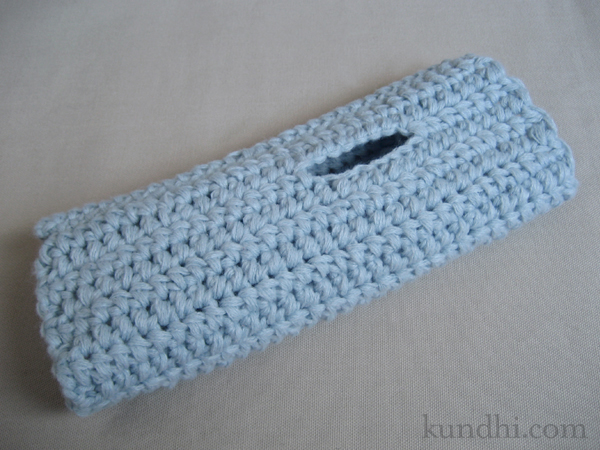
SC the last row and your first chain row together to make a tube. Cut yarn, weave ends and turn inside out.

wrist warmer crochet pattern

Step 7
Repeat for the other hand, but change Step 4 to the following:
Make the thumb opening: DC until C (14) stitches remain, chain B (7), skip B (7), DC B (7).

stash: I used recycled sweater yarn for these. It’s a soft acrylic that’s machine washable. I may need to make a pair for myself, too!

tiny crochet ball pattern

tiny crochet ball pattern

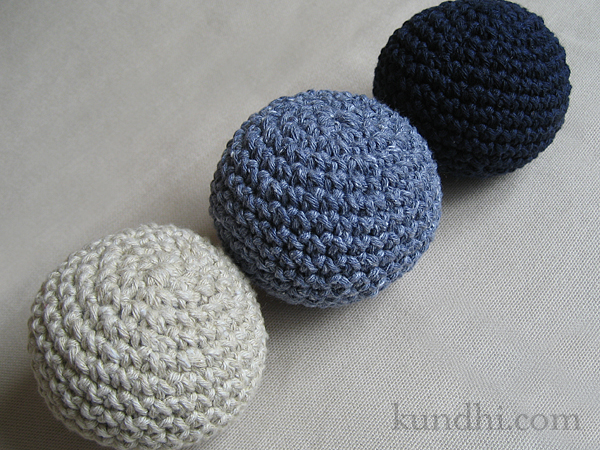
It took a few tries until I was satisfied with this pattern. At first, they were coming out too hexagon shaped, so I decided to alternate the increase/decrease placement every other row. That gives the ball a more round shape.

I also wasn’t happy with the gaps that the decreases made, especially on the navy ball. You could see the white stuffing! Then I remembered this invisible decrease from Planet June. Problem solved!

Have fun with this one. On Friday I’ll show you a little variation. Stay tuned!

Tiny Crochet Ball Pattern
worsted weight yarn (I used Aunt Lydia’s cotton)
size G/6 (4.25mm) crochet hook
polyfil for stuffing
tapestry needle for weaving ends

sc: single crochet
inc: 2 sc in one stitch
dec: 1 sc over two stitches through the front loops only

gauge: not important, but mine are about 2 1/2 inches wide

Make a magic ring.
R1: 6 sc into ring
Ball worked as a spiral. Place marker to keep track of rounds.
R2: inc in each stitch around
R3: *inc, sc* around
R4: *2 sc, inc* around
R5: *inc, 3 sc* around
R6: *4 sc, inc* around
R7-11: sc around
R12: *dec, 4 sc* around
R13: *3 sc, dec* around
R14: *dec, 2 sc* around
R15: *1 sc, dec* around
Stuff with polyfil
R16: dec around

how to: crochet jar cover in 3 easy steps

quick jar cover

This is what’s left of my outdoor garden. We did not have very good luck this year: no tomatoes and only one cucumber. My petunias were doing great until a big storm almost blew them out of the pot. Sadly, I didn’t notice the roots were above the soil until the whole thing was turning brown.

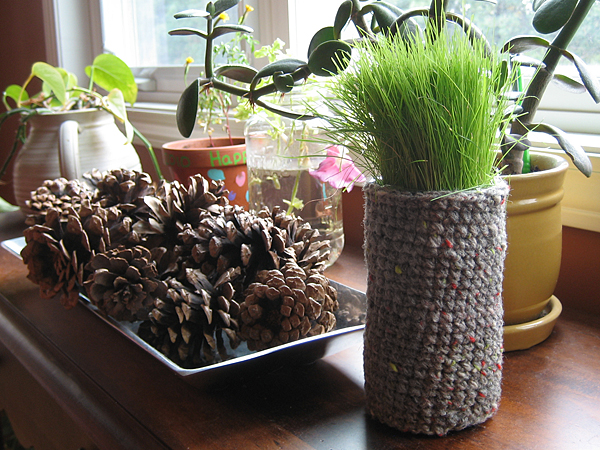
You know what is growing? My daughter’s little grass pot. She made this in summer camp and it’s the greenest, healthiest plant of the summer. The container is just a recycled plastic jar and I figured after almost two months, it finally deserved a proper cover.

How to Crochet a Jar Cover in 3 Easy Steps

Materials
worsted weight yarn
size G hook

Gauge is not important for this project.
Adjust your hook size for different yarn weight.

Step 1
Chain enough stitches so that the chain fits snugly around the jar. Join to make a circle.

Step 2
Single crochet around and around until you’ve got the height you want.

Step 3
You’re going to want an even top edge, so we’re going to pick a spot to start the top row. (You can use the tail as a guide and follow the line of stitches up if you want to be precise.) Slip stitch, chain one and single crochet around until you reach the chain one. Slip stitch into the chain one and finish off.

When you weave in your ends, use the tails to even up the bottom and top edges. You can see in the picture that my bottom edge isn’t perfect. Oh, well.

stash: This is a great project for using up leftover yarn. Because the rows spiral up, it’s not great for stripes. You’ll get a “jog” when you change colors.

how to make a ruffle scarf in 3 easy steps

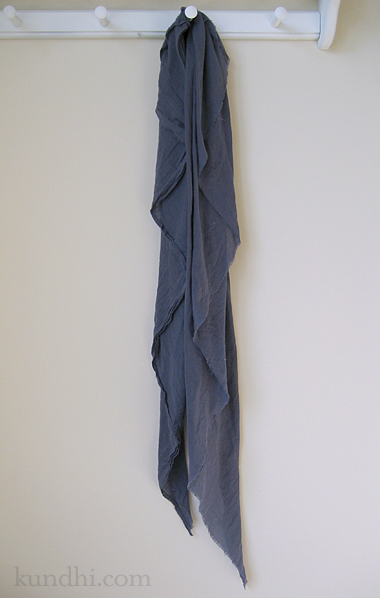
The other day I saw a woman wearing a cotton scarf that was layered and unfinished in the most beautiful way. She looked like she just walked off a catalog shoot. I’ve never been able to pull off that “I just threw it on and it looks perfectly ruffled” look, so I decided to design one that made it easy.

ruffle scarf tutorial

Step 1
Cut a large triangle of fabric on the bias. I chose a lightweight cotton, but anything with a nice drape would work. (Flannel would be nice for Fall.) My piece measured 80 inches across the base and 32 inches high. Run it through the washer and dryer to fray the edges.

Step 2
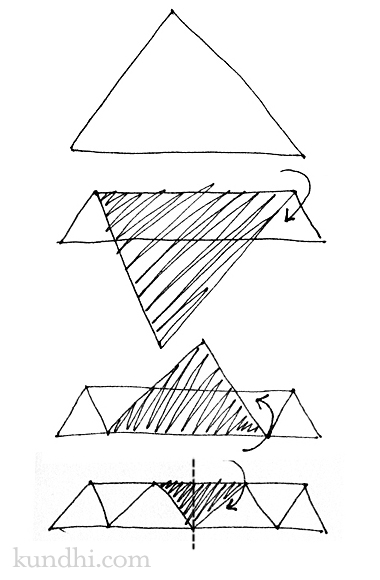
Fold the ruffles. I figured a diagram would be easiest to understand. I folded mine 8 times, but you don’t need to see that many steps to get the idea.

ruffle scarf tutorial

Step 3
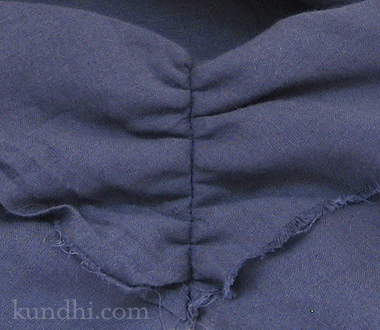
Stitch the ruffles in place. I didn’t back tack and pulled on the threads to create a little gather before I tied them off.

ruffle scarf tutorial

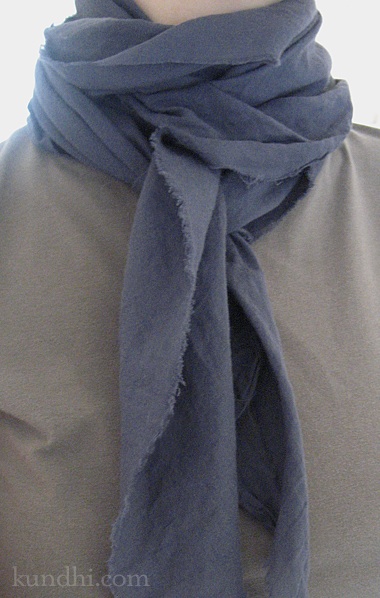
That’s it! You can wear it with the ruffles hanging down or wrap it around a few times with the ruffles facing out for that perfectly unfinished look.

ruffle scarf tutorial

how to add adjustable elastic to kids’ pants in 5 easy steps

adjustable elastic kids pants

My daughter is growing like a weed, except she’s only growing up, not out. She’s got 4-5T legs and a 3T waist. That means that most of the pants we find that are long enough won’t stay up.

I try to only buy pants with an adjustable waist, but sometimes I come across a great deal or something super cute that I just can’t pass up. I decided to try adding elastic myself, and you know what? It’s super easy!

You can even do this without a sewing machine as long as you don’t mind a little hand stitching.

Materials
button hole elastic
small, sharp pair of scissors
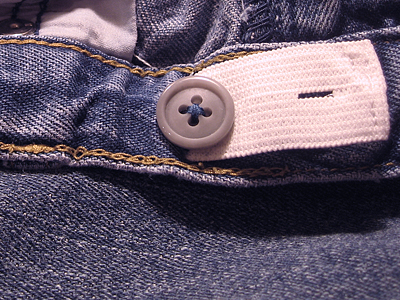
two buttons that fit through your elastic
Fray Check
needle and thread

Step 1
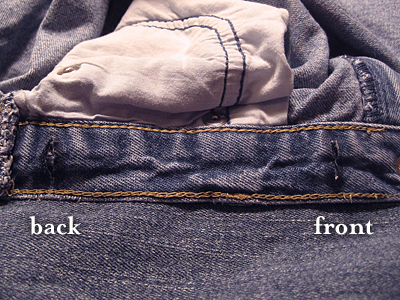
Starting on the right inside of the waist, snip two holes to create a casing for the elastic. Make sure your scissors don’t go through to the other side! Apply Fray Check to the raw edges.

adjustable elastic kids pants

Step 2
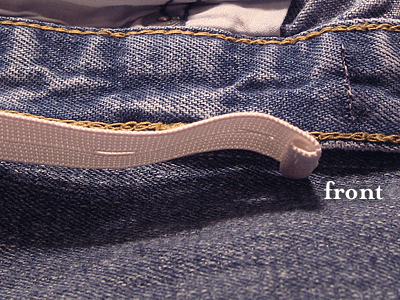
Cut a piece of elastic that’s about one inch longer than between your holes. Fold one edge over and sew. This is the edge you’ll be using to adjust the pants.

adjustable elastic kids jeans

Step 3
Sew a button in front of the casing you’ve created.

button hole elastic

Step 4
Thread the elastic through the waist casing with the finished edge going through the front. You can tuck the unfinished edge into the back.

adjustable elastic kids jeans

Step 5
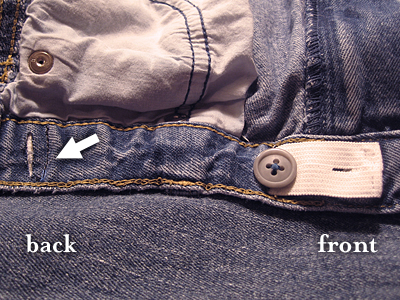
Sew a line of stitches to secure the elastic. See arrow.

adjustable elastic kids pants

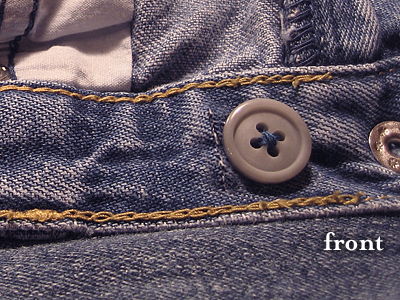
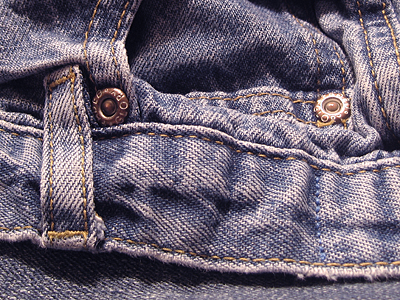
Here’s what you’ll see on the outside of the pants.

Repeat on left inside of the waist.

refashion: The only thing worse than sizing for women’s pants is sizing for kids’ clothes. At least with this little trick, I can just make sure pants look long enough when I buy them. It’s nice knowing how easy it is to adjust the waist. Maybe I should try this on my jeans!

how to sew a baby quilt in five easy steps

snoopy baby quilt

So you’d like to make a quilt, but you’re intimidated by all of those little pieces, right? I am, too. But you can make a quilt without blocks. It’s easy and looks just as nice! Here’s how I did it:

Materials
1 – 36×36″ piece of top fabric
1 – 36×36″ piece of bottom fabric
1 – 36×36″ piece of batting
1 – 38×8″ piece for making the trim*
matching thread
bias tape tool
rotary cutter and ruler
walking foot (optional)

*even easier: use 4 yards (plus a few inches) of pre-made bias tape

Step 1
Lay your fabric on the floor wrong sides together with the batting in the middle. Pin baste from the center outward.

Step 2
Starting from the center and working your way outward, draw parallel lines every four inches with sewing chalk, water soluble pen or light pencil.

Step 3
Starting from the center, sew along these lines working your way outward, taking out the basting pins as you go. Here’s where a walking foot is helpful, but if your batting isn’t too thick, you should be fine without it. Square up your edges with a rotary cutter and ruler.

Step 4
Cut your trim fabric according to the measurements for your bias tape tool and make the trim. Even easier: open the package of pre-made bias tape.

Step 5
Fold the trim over the edge and attach with a zig zag stitch. Fold the ends over at the corners to enclose the raw edges.

snoopy baby quilt

I hope I didn’t oversimplify this, but it’s really easy. The zig zag trim takes a little practice. This was my first time, and I’m sure it will get a lot neater the more I do it.

resource: I was inspired by Soule Mama’s Beach Blanket To-go for this blanket. One day I hope to make something as beautiful as her daughter’s quilt, but for now, I’m going to stick with single pieces of fabric until I’ve got more free time.

how to sew a placemat zipper pouch with only four seams

zipper pouch tutorial

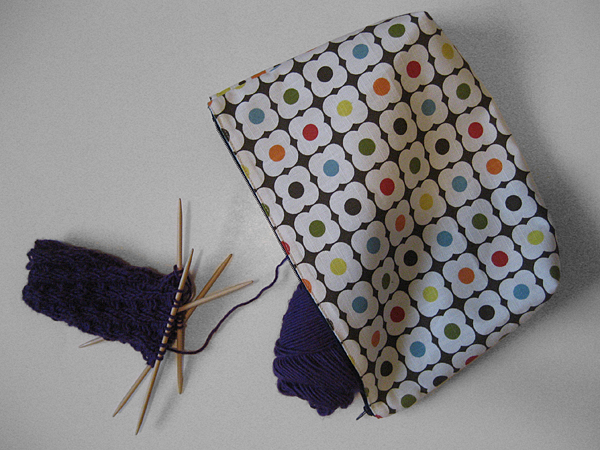
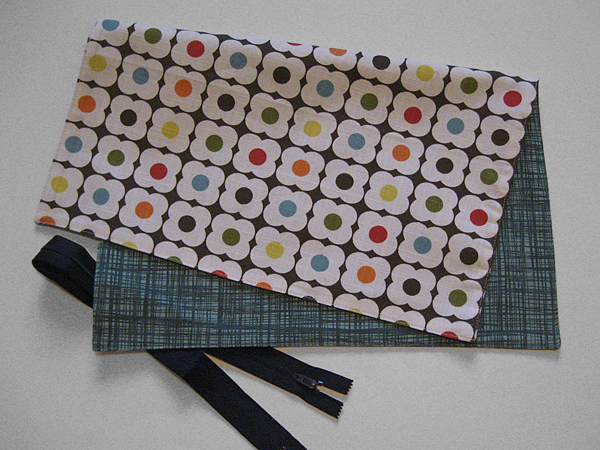
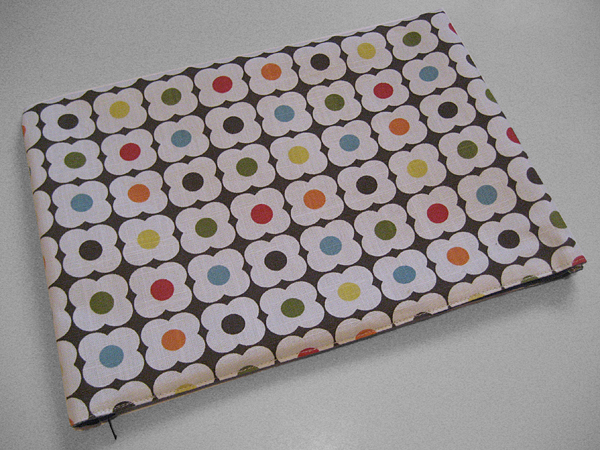
I found this cute Orla Kiely placemat at Target a few weeks ago and wanted to make something quick and easy for my knitting. Because the edges are already finished, I only needed to sew four seams. If you want a gusseted pouch, you can sew two more seams. Either way, it’s a very fast and easy project.

zipper pouch tutorial

Materials
a placemat (mine was 14 x 17 inches)
a zipper that’s at least 14 inches
coordinating thread
heavy duty sewing needle
zipper foot

zipper pouch tutorial

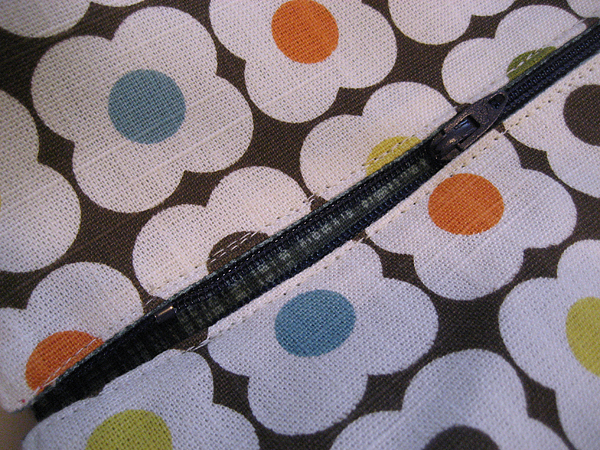
Using your zipper foot, stitch each 14 inch side to the zipper, beginning and ending 1/2 inch from each side.

zipper pouch tutorial

With the zipper halfway open, turn the placemat inside out. Sew your side seams while holding the zipper out of the way. (This is why you left 1/2 inch unsewn on each side.)

zipper pouch tutorial

Turn the placemat right side out and you’re done! If your zipper was longer than 14 inches, you can trim the extra.

Optional Gussets

zipper pouch tutorial

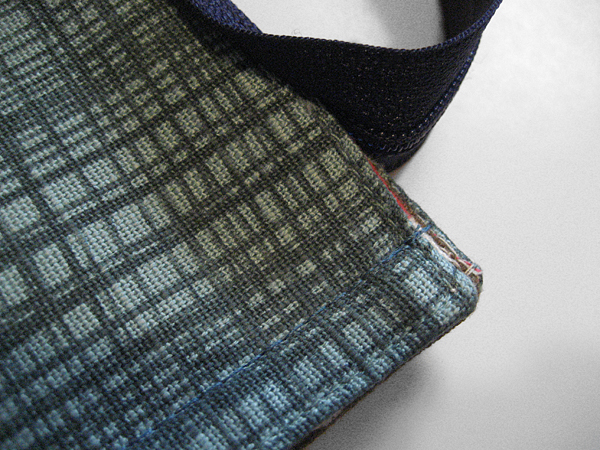
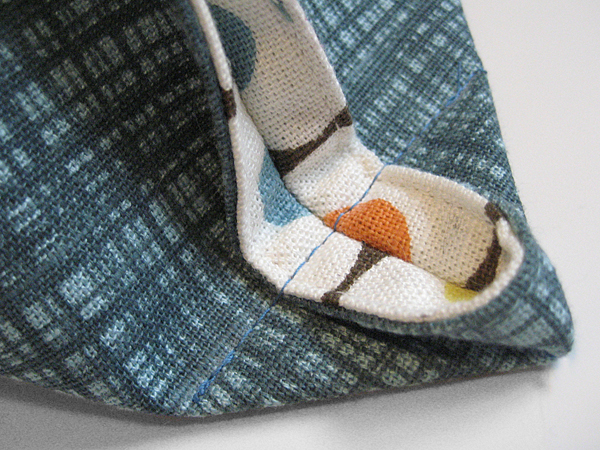
Box your corners, but don’t trim. The triangles are small and won’t take up much room. Plus, you’ll have no raw edges that might unravel.

zipper pouch tutorial

Want to see more projects using Orla Kiely placemats? Thimbly Things made a cute purse with hers and linked to a bunch more adorable bags.

refashion: Using finished items like placemats make your projects fast and easy because your edges are already finished.

Thanks to Whip Up, Craft Gossip and One Pretty Thing for linking to my tutorial. Subscribe to my RSS for more crafty goodness!

easy kids shorts pattern

from the julie-bird.com archives

UPDATE: Thanks to the Craft Magazine blog for their link to my pattern!

I’ll say right up front, this isn’t an original idea. There are lots of tutorials on the web on how to make kids pants, like here and here. There’s also a cool how-to in The Creative Family.

I also need to note that my daughter really doesn’t need any more pants. She has plenty, and it’s too hot to wear them now anyway. So, I did the next best thing. I made her shorts! (Shhh… she has plenty of shorts, too. I just really wanted to sew these and was looking for an excuse!)

easy kid shorts

They turned out nice. The t-shirt fabric is from one of my old Gap shirts that has a little stretch to it. I didn’t make them too snug, and hopefully they’ll last through the rest of the season.

easy toddler shorts

I used a pair of her shorts as my pattern and traced them onto paper first. The template fits on an 8.5 x 11 piece of paper, so I figured why not share it with the blog world? You can download it here.

Drop me a line and let me know if you make a pair. I’d love to see a photo if you do! Also, this is my first attempt at writing a sewing pattern. Please let me know if something isn’t clear!

recycle: Use large t-shirts instead of new fabric to make soft, comfy kids clothing.