angry bird

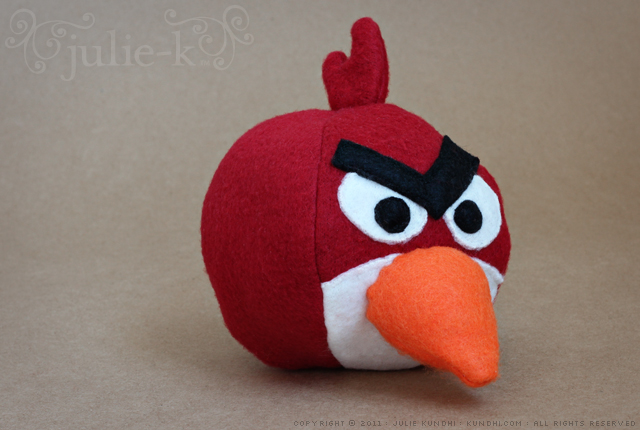
angry bird plush

I’ve never played Angry Birds. My husband and daughter have, though. It’s not my first choice in children’s video games, but once my daughter was exposed to mean pigs stealing eggs, there was no going back.

Instead of constantly being the Debbie Downer who doesn’t have the game on my phone, I asked Santa if he would bring us the Angry Birds card game. We haven’t played yet, but it’s made by UNO, so I’m hoping it will be a fun alternative.

Once I learned there was an Angry Bird plush pattern, I knew I had to make one to go along with the game. So far, the bird has been a big hit. I’ll let you know about the game once we get a chance to play.

pattern: Obsessively Stitching has patterns for all of the characters. (I had no idea there were so many different birds in this game!)

stash:
Red and white fleece are leftovers from other projects. Black and orange fabrics are actually craft felt, which worked better than I expected.
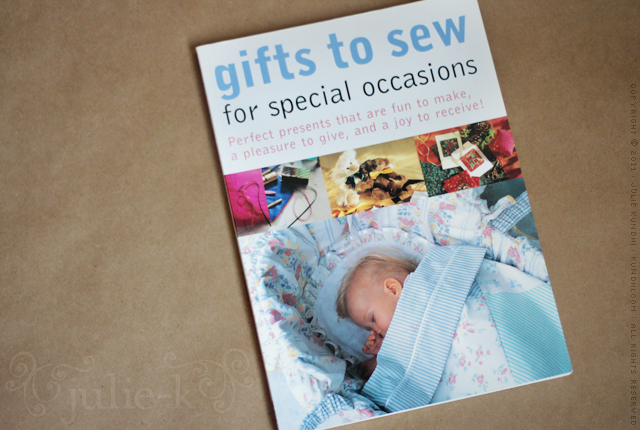
craft book giveaway: gifts to sew for special occasions

Comments closed. Congratulations Lawana!

sewing book giveaway

Let’s start the week with a giveaway!

Gifts to Sew for Special Occasions is filled with lots of different great stuff. First off, if you’ve been swooning over the teepee on the cover of Growing Up Sew Liberated, you’ll find a very similar pattern in this book. Some of my other favorite projects are:

• drawstring gift bag with circular base
• fabric roses
• teddy bear
• rag doll
• clothes for the rag doll
• hobby horse

There are also some cool projects to get your creative juices flowing:

• making embroidered brooches
• sewing with canvaswork
• sewing accessories out of grosgrain ribbon
• Italian quilting
• heirloom sewing

You can take a look at the table of contents and index on amazon.com.

How to enter: Leave a comment on this post. Just say hello or let me know how the weather is in your neck of the woods. It’s cold and snowy over here.

Bonus entry: Share this giveaway on facebook, twitter, [insert your favorite social networking site here] and leave another comment.

I’ll close comments on Saturday, December 10th. Shipping is free within the U.S. International folks are welcome to enter, but I’ll need a few bucks via paypal to cover sending it overseas.

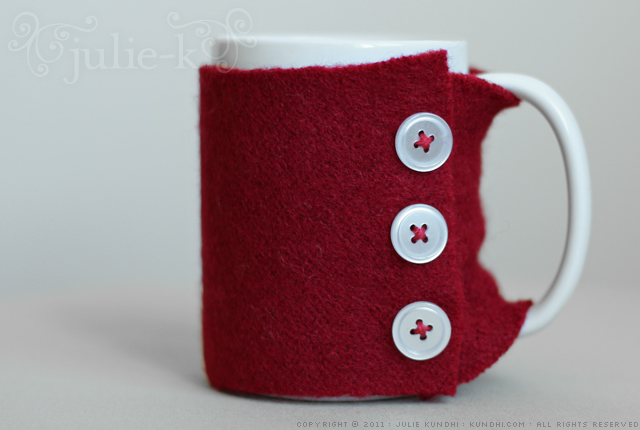
felted wool sweater mug cozy

felted wool sweater mug cozy

Why yes, I did make a wool sweater for my mug.

Even though the Autumn temps are still beautiful here in Nebraska, the mornings are a bit chilly. My tea needed some help staying warm.

I tried not to over think this project — it is a mug cozy, after all — but a quick search on Pinterest and Etsy turned up so many cool ideas. Only problem was that while I was lost in cozy-land, my tea was getting cold.

So I dug into my stash of felted wool sweater bits and found a piece long enough to wrap around my mug. I secured it with a few buttons and embroidery thread. The buttonholes are just little slits. (You can cut felted wool and it won’t unravel.)

So there you have it. Cozy morning tea.

* * * * *

Thanks to everyone for sharing their thoughts on decluttering and congratulations to Erica Arehart on winning the sewing book. I’ll have a knitting book up later this week.

craft book giveaway: so easy home sewing

Comments closed. Congratulations Erica!

I’ve been decluttering a lot lately. The past few weekends I’ve focused on paper: books, magazines and outdated files. Yes, you read the first one correctly — books — and there are quite a few craft books. I pulled them from the donate pile and decided it would be much more fun to have a few giveaways. Everyone loves giveaways, right?

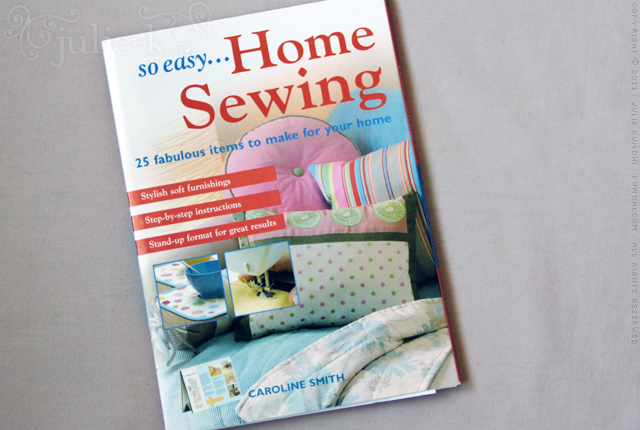
First up is So Easy…Home Sewing: 25 Fabulous Items to Make for Your Home.

sewing book giveaway

from amazon:
It covers all the basics, starting with the seams and hems, through to piping and borders and tassels and trims, with helpful information about fabric selection, stitches, a sewing machine guide, the essential equipment, scissors, notions and other tools, needed to get started. The book is set up as a series of workshops enabling the sewer to first learn the techniques involved and then go on to create simple projects using those techniques.

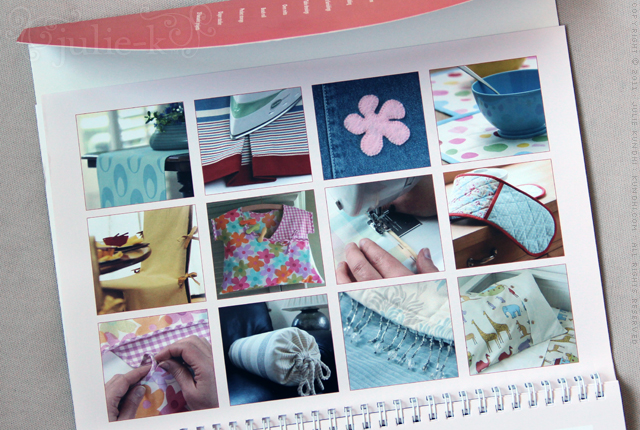
You can take a look inside the book on amazon and see both the table of contents, which lists the projects, and the index. Here’s a look at some of the projects.

sewing book giveaway

How to enter: Leave a comment on this post. You don’t need to say anything but hello, but I’m curious if anyone else out there has been decluttering. Do you do it regularly? Once a year? Once a decade?

Bonus entry: Share this giveaway on facebook, twitter, [insert your favorite social networking site here] and leave another comment.

I’ll close comments on Monday, November 14th. Shipping is free within the U.S. International folks are welcome to enter, but I’ll need a few bucks via paypal to cover sending it overseas.

If sewing isn’t your thing, don’t worry. Next up will be a knitting book. Good luck!

how to make a cat costume in 3 easy steps

black cat costume

I tried to be proactive this year and started the Halloween costume conversation at the beginning of October. My daughter insisted she wanted to be Abby Cadabby again. I encouraged her to try a different costume and brought it up several times. Nope. She was sure. Abby Cadabby.

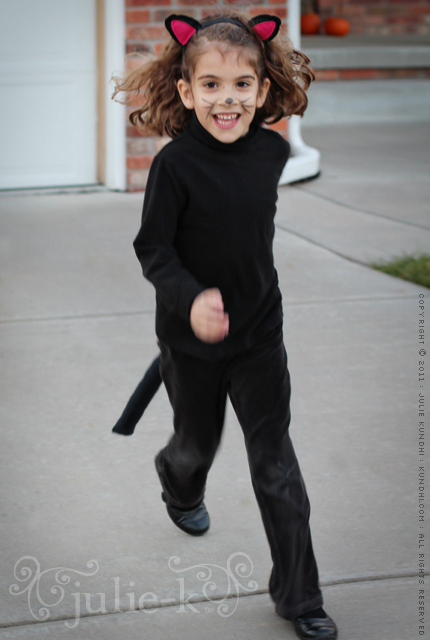
So I bought her a bigger pair wings because what I threw together for her last year was just too small. A few weeks later she casually mentioned that she wanted to be a cat. And then she couldn’t decide between the two. After a week of indecision, I finally made a tail and some ears and said, “Great news! You’re going to be a cat for Halloween!”

A cat is a great last minute costume, especially if you have all the materials in your stash. And it’s not just great for kids. The tail is long enough for a mama cat, too!

Step 1
Look through your child’s wardrobe for a monochromatic outfit. My daughter could have been a brown or black cat. I chose black.

Step 2
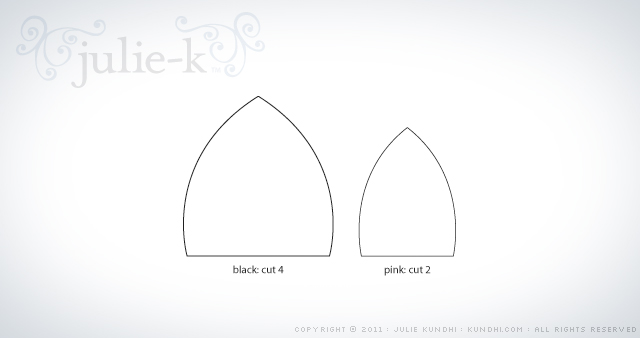
Make some ears. I cleaned up my rough pattern for you. When printed, the larger piece should be 2 1/2 inches tall. Sew pink to black, then black to black. Stuff with a little bit of fiber fil if you like, then stitch onto a headband. (I used a Goody Slide Proof Headwrap.)

black cat costume

Step 3
Make a tail. I used black flannel from my stash and cut a three inch wide strip from selvedge to selvedge. Sew up the sides, turn right side out and stuff. Sew a loop of elastic the size of your child’s waist to the selvedge ends.

That’s it! It took less time to make the costume than it did for my daughter to decide what she wanted to wear. The only thing I had to buy was the liquid eyeliner for her nose and whiskers. I think I’ll use it for some cat eyes on myself tonight.

I’d love to see what you are making for Halloween this year. Share a link in the comments!

birthday superhero cape

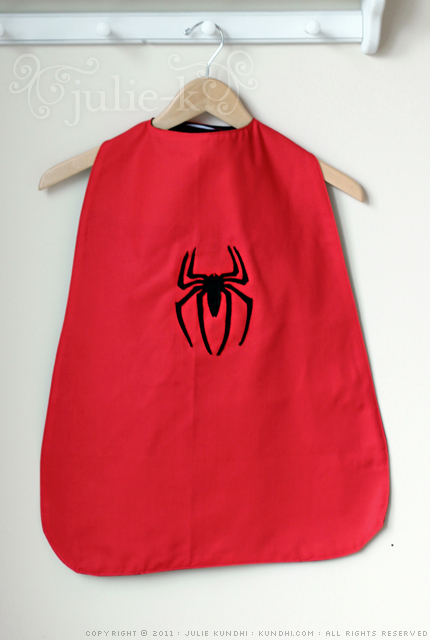
My daughter’s friend Mason loves Batman. We got him some superhero books for his birthday, but they didn’t seem fun enough. I thought maybe a special cape would make his gift more exciting.

reversible superhero cape

I found some black and red canvas-like fabric in my stash that I thought would be great for this project — wrinkle resistant and durable. Apparently, it’s Ultra Heat’n Bond proof, too. I wound up stitching on the appliques and gunked up my needle in the process. Bah!

The cape is reversible and I toyed with the idea of adding a Husker N or Mason M on the other side. His mom suggested Spiderman. Of course, it wasn’t until after I finished that we both realized Spidey doesn’t wear a cape. Oops! I spent a lot of Saturday mornings watching Super Friends. I should have known that!

reversible superhero cape

Anyway, I’ve always wanted to make a cape and now I have. And of course, after all of that, he was more interested in the books. Kids. Gotta love them!

cape tutorial: I used Georgia Leigh’s free cape tutorial and freehand sketched the pattern onto my fabric. She also has applique stencils available. I traced my own because I wanted the Batman logo to match the new Dark Knight logo that was on one of the books.

how to: sew a reusable filter for cold brewed coffee

how to make an cold brewed coffee toddy filter

When I first moved to Lincoln, it was a no-Starbucks town. As I explored the local coffee shops for my daily iced latte, one of them recommended an iced toddy. It was love at first sip.

If you’ve never had cold brewed coffee, let me tell you it’s the most amazing thing ever. It’s less acidic than the hot stuff and therefore easier on your stomach. It also has a subtle sweetness that’s just about perfect, and I say that as someone who cringes at the thought of adding sweetner to a cup of joe.

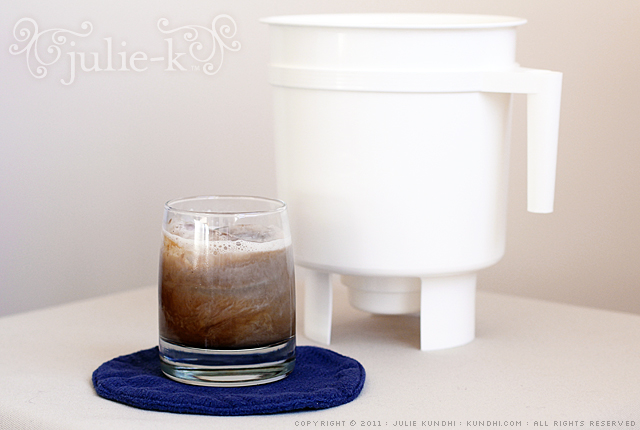
I immediately purchased a Toddy Coffee Maker so I could make decaf at home and drink it all day long. That’s only a slight exaggeration. My only frustration was the darn filter. They’re supposed to last a few months in the fridge, but mine were only making it through 2-3 brews. Then one day, the Pioneer Woman posted her recipe for The Perfect Iced Coffee and a lightbulb went off. I could make my own reusable filter!

how to make an cold brewed coffee toddy filter

Here’s how I did it:

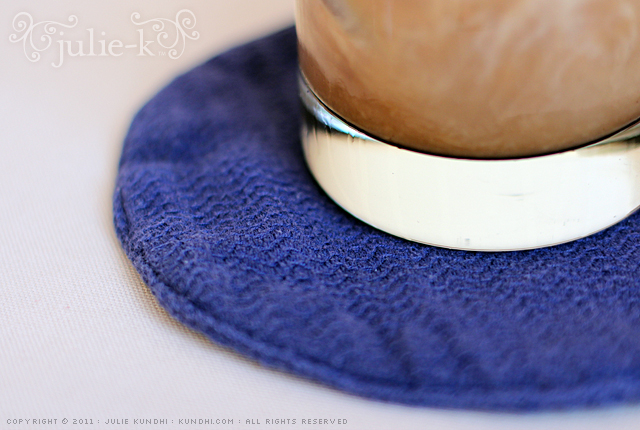
  1. Grab a tea towel, the thinner the better.
  2. Fold in half and trace the top of the toddy maker as your pattern.
  3. Cut through both layers of the towel to get two circles.
  4. Sew circles together right sides facing, leaving a gap for turning.
  5. Turn right side out, tops titch around to close up the gap.

I’ve used this a few times and it works great. I just rinse off the grinds and throw it in the wash. If you cold brew at home, quit buying filters and make your own!

project details: I used the tea towels from my failed attempt at coffee grind dyeing, and yes, they’re still blue. I bought my toddy online, but a lot of local coffee shops carry them. Buy local if you can. Here is Ree’s recipe for the Perfect Iced Coffee. Note: I just use coffee and almond milk, but her concoctions sound sinfully delicious.

This is not a product endorsement or paid review. The Toddy folks have no idea who I am. I just love cold brewed coffee and dislike buying disposable filters.

easy kids bike shorts pattern

wardrobe refashion

The bike shorts pattern is finished and ready for download! It’s been over two years since my original Easy Kids Shorts pattern and I do a few things differently now.

  • These days I sew the inseams first, then the rise.
  • I almost always use a 1/4 inch seam allowance instead of 1/2 or 5/8 inch, usually because I’m trying to squeeze as much as I can out of a piece of fabric or t-shirt.
  • 3/4 inch elastic seems to be more comfortable around the waist than the smaller widths.
  • Now that I have a serger, I finish my raw edges and just fold the waist over once. You can finish your edges with a zig zag/overlock edge or adjust the pattern to accommodate the double fold waist.

I recommend you pay attention to the type of knit fabric you use. The original piece I traced for this pattern was a tightly-knit jersey. The t-shirt I used was a loosely-knit jersey and the shorts turned out a little big. Not big enough to re-sew, but definitely roomier.

Finally, my daughter is long and lean: 20 inch waist and 14 inches from waist to knee. Adjust seam allowances and elastic size to get a better fit for your child. Want them shorter? Trim off the bottom of the pattern an inch or two.

Please leave any questions in the comments. Download the pattern here. Enjoy!

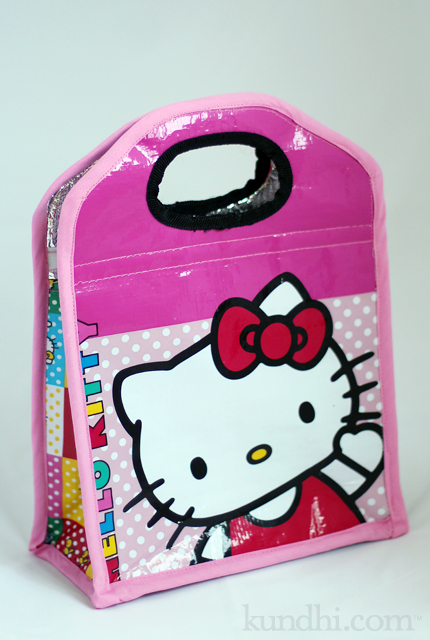
after: hello kitty lunch bag + some helpful tips

lunch bag refashion

So, I survived this crazy project. Actually, the only thing that was really difficult was the bias trim, especially around the corners. But I’m not very good at bias trim to begin with, so there’s that.

I was surprised how easy this insulated-plastic-foil material is to sew. I picked out the original trim stitches and all of the pieces fell apart. I cut everything down to size and serged around all of the edges, then I serged the pieces back together. I know that sounds like overkill, but the material was made up of three layers and I didn’t want manipulate six layers of slippery stuff when I did the trim.

Some very important things to keep in mind for a project like this:

  • Remind yourself how much you love your child. I found this especially helpful sewing around those corners with the trim.
  • Have a friend close by via text for encouragement. Send her pictures of your bent sewing machine needle just for fun.
  • Keep chanting the mantra: It doesn’t have to be perfect, it just needs to make my child happy.
  • Embrace your organic style as breaking the rules and your wonky stitches as a design element.
  • Remind yourself that some kid in China probably put this together the first time. If she could do it, so can you.
  • Let go of the little things, like matching the black and pink trim in the handle. It’s just another design element.

That’s about all I’ve got to say about this lunch bag. My daughter loves the pink and she stuffed it in her backpack this morning with no problem.

stash: Finally digging into my thrifted stash of bias trim. It’s about time!

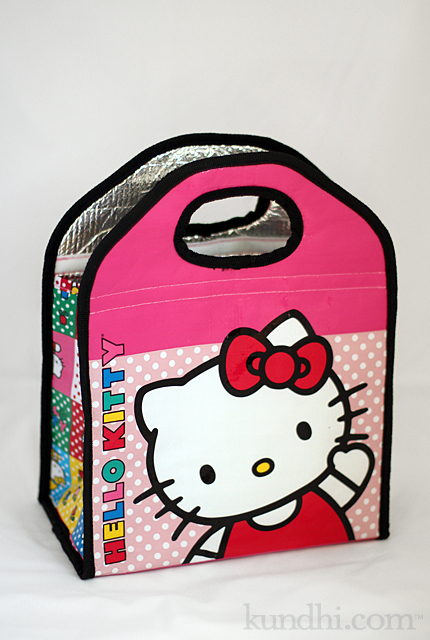
before: hello kitty lunch bag

lunch bag refashion

I am crazy. I normally have no problem taking a seam ripper to anything. I cut up stuff and turn it into something new all the time.

Except for this lunch bag.

It fits a little too snug in my daughter’s backpack. Her teacher mentioned a bigger backpack or smaller lunch bag would be helpful. We actually have a Hello Kitty metal lunch box that she can use, but she wants this bag.

“You can fix it, Mama. Just make it a little smaller. Please?

I texted a picture to my friend Kelly. “You can do it!” she said. I told my daughter it might not look exactly the same and I’d have to cut into the picture of the kittens on the back. “That’s ok, Mama. You can do it.” she said.

So I guess tomorrow I’ll be cutting up this cute little bag so it will fit in her backpack. Why won’t she just use the metal Hello Kitty lunch box you ask? Because that’s what she uses for her toy food, silly.

Wish me luck!