refashion: “new” skinny jeans

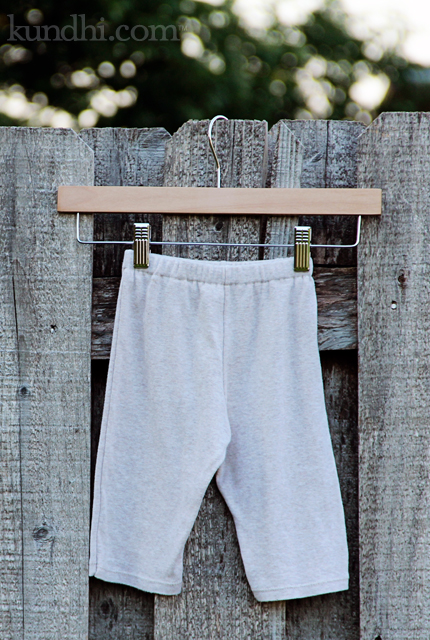
You know what’s weird about skinny jeans? They never look too short. There are long and ankle length. When they really get short, they become capris. You just can’t go wrong. This is good when your daughter is growing like a weed, but only up and not out.

Temps are getting cooler, so we went through her stash of jeans this weekend. The 10s were a wee bit too short, but fit fine in the waist. The 12s were also a wee bit short, and were way too big in the waist. I decided to do the only logical thing: turn the 10s into skinny jeans.

Ironically, she has a really nice, brand new pair that she hates. They have a decorative seam down the top center that “feels weird.” They look so great on that I refuse to let them go. I’m convinced she’ll come to love them. In the meantime, they became the perfect pattern for refashioning four other pairs.

It’s really amazing to see a pair of pants transformed from something that looks like they’re ready for a flood to something cute and trendy. She was particularly happy that I gave new life to her sparkly Jordaches. (I got my first pair of Jordache jeans when I was just a little bit older than she is now. I LOVED them.)

So today was a good day. I watched football, had a Starbucks, and sewed up a storm. Hello, Fall. We’re ready for you!
is there problem fray check can’t solve?

20130327-232417.jpg

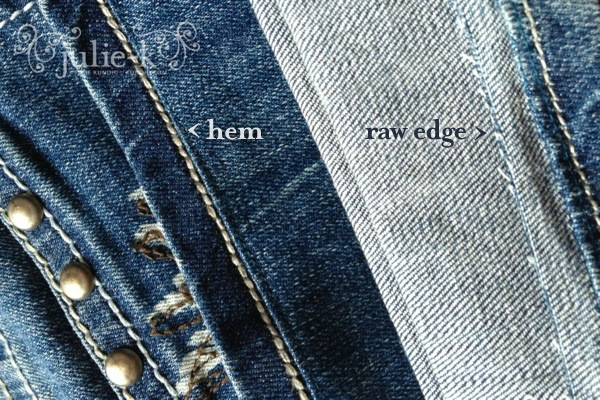
A friend of mine asked me to hem a pair of jeans for her. Last time I did this, I didn’t have to take them up too much, and I just tacked the extra material to the inside seam.

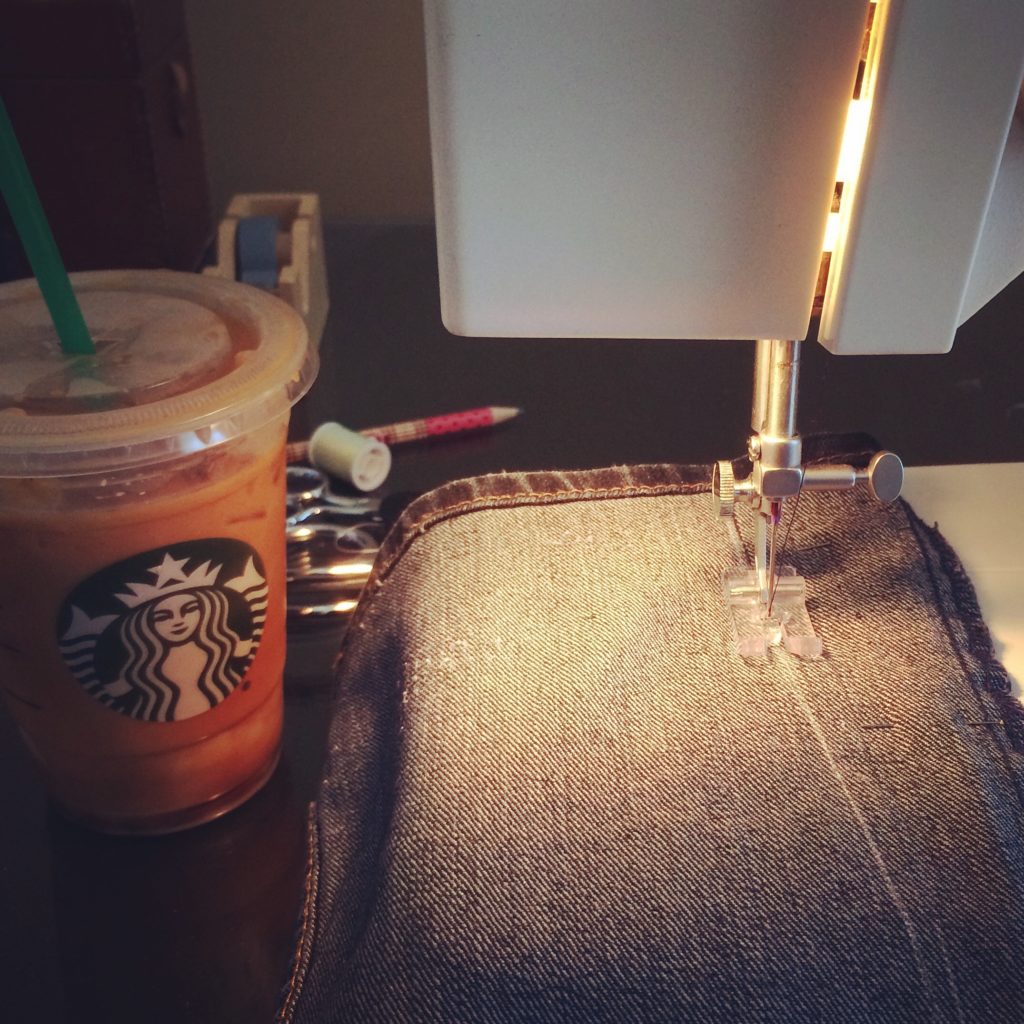
This pair needed to be taken up more than that, and there was quite a bit of denim leftover, making a giant cuff on the inside of the leg. My plan was to cut it off and serge the ends to keep it from fraying. When it came to the side seams, my serger had other plans. “No thank you,” it politely said as the denim refused to let go of the needle.

So I fell back on my tried and true method for raw edges: fray check. It feels a little stiff now, but I bet after one washing it will soften up.

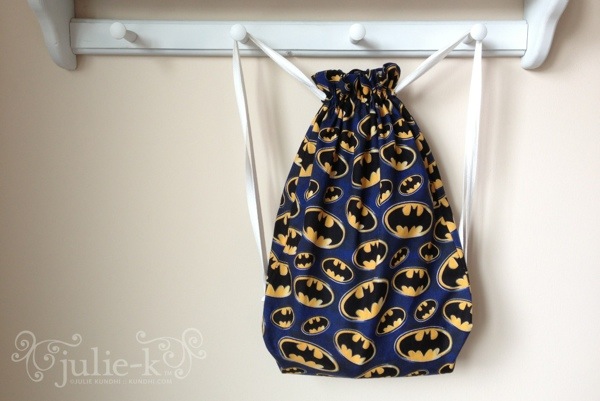
fabric gift bag with a twist

20130207-202854.jpg

I can’t believe it’s been over three years since I made my gift bag resolution. Since then I’ve been reusing bags we have been given and making bags when I need them. The only bags I’ve purchased are plain kraft bags. Wow. I impress myself.

Although I like the practice, I’ve been rethinking the drawstring gift bag lately, and wondering if I could do more with it. The whole point of making a simple gift bag is that it’s simple. I don’t make a lining or finish the inside edges aside from serging. If it takes too much time to make, I won’t do it.

Most of the bags I make are for kids’ gifts, so I started to think, “What kind of bag would be most fun for both boys and girls?” The answer I came up with was the drawstring backpack.

However, while that pattern isn’t hard, it’s not simple either. I wanted to stick with my no lining, serged edges policy. The result is essentially a drawstring bag with straps: when making a regular drawstring bag, add bottom loops when seaming up the sides and make the drawstrings longer. It’s almost too easy.

I used all four threads on my serger to make the seams extra sturdy and reinforced the stitches by the loops. It’s a gift bag, not a rugged backpack, but you never know what kinds of things a child will want to carry around.

stash: Batman fabric in my stash was free. I think it came from a friend of a friend. It was an odd shape, clearly leftover from some other project. It took some creative thinking to get two nice-sized pieces out of it. White cotton twill tape originally bought to make labels for myself, but they didn’t work out.

oops! I just realized you can’t see the bottom loops in the photo. They are the same as the loops over here.

easy kids bike shorts pattern

wardrobe refashion

The bike shorts pattern is finished and ready for download! It’s been over two years since my original Easy Kids Shorts pattern and I do a few things differently now.

  • These days I sew the inseams first, then the rise.
  • I almost always use a 1/4 inch seam allowance instead of 1/2 or 5/8 inch, usually because I’m trying to squeeze as much as I can out of a piece of fabric or t-shirt.
  • 3/4 inch elastic seems to be more comfortable around the waist than the smaller widths.
  • Now that I have a serger, I finish my raw edges and just fold the waist over once. You can finish your edges with a zig zag/overlock edge or adjust the pattern to accommodate the double fold waist.

I recommend you pay attention to the type of knit fabric you use. The original piece I traced for this pattern was a tightly-knit jersey. The t-shirt I used was a loosely-knit jersey and the shorts turned out a little big. Not big enough to re-sew, but definitely roomier.

Finally, my daughter is long and lean: 20 inch waist and 14 inches from waist to knee. Adjust seam allowances and elastic size to get a better fit for your child. Want them shorter? Trim off the bottom of the pattern an inch or two.

Please leave any questions in the comments. Download the pattern here. Enjoy!

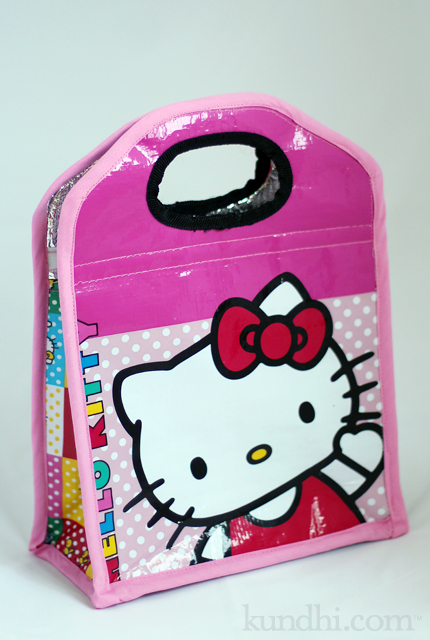
after: hello kitty lunch bag + some helpful tips

lunch bag refashion

So, I survived this crazy project. Actually, the only thing that was really difficult was the bias trim, especially around the corners. But I’m not very good at bias trim to begin with, so there’s that.

I was surprised how easy this insulated-plastic-foil material is to sew. I picked out the original trim stitches and all of the pieces fell apart. I cut everything down to size and serged around all of the edges, then I serged the pieces back together. I know that sounds like overkill, but the material was made up of three layers and I didn’t want manipulate six layers of slippery stuff when I did the trim.

Some very important things to keep in mind for a project like this:

  • Remind yourself how much you love your child. I found this especially helpful sewing around those corners with the trim.
  • Have a friend close by via text for encouragement. Send her pictures of your bent sewing machine needle just for fun.
  • Keep chanting the mantra: It doesn’t have to be perfect, it just needs to make my child happy.
  • Embrace your organic style as breaking the rules and your wonky stitches as a design element.
  • Remind yourself that some kid in China probably put this together the first time. If she could do it, so can you.
  • Let go of the little things, like matching the black and pink trim in the handle. It’s just another design element.

That’s about all I’ve got to say about this lunch bag. My daughter loves the pink and she stuffed it in her backpack this morning with no problem.

stash: Finally digging into my thrifted stash of bias trim. It’s about time!

wardrobe refashion: t-shirt to bike shorts

wardrobe refashion

My daughter loves wearing dresses. She also loves to climb tall jungle gyms and roll around in the grass with her feet in the air. She understands the concept of modesty, but she’s too busy running, jumping and playing to be worried about such things right now. I get it. I want her to have fun and not be self conscious. So the new rule: bike shorts under dresses.

A few years ago, I posted a pattern for easy kids shorts. I followed the same basic steps to come up with the bike short pattern. I had also planned to share the template with you, but it’s gone missing. Whoops!

I have a few more to make, so I guess I’ll be redrawing the pattern. I’ll let you know when it’s posted. In the meantime, I’ll be outside teaching my daughter how to do cartwheels.

stash: One of my t-shirts rescued from the donation bag. Thrifted elastic.

A seriously fast, easy and inexpensive project. Plus, they go under a dress, so they don’t have to be perfect!

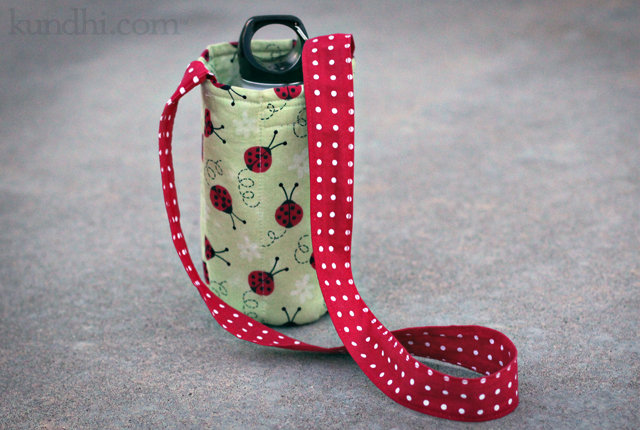
ladybug water bottle carrier

water bottle carrier

Yes! I did a little bit of sewing!

The heat wave has passed, but it’s still hot. (It is Summer, after all.) My daughter has a few days left of camp outside, so I got her a small water bottle to take along. I couldn’t imagine her carrying it around without leaving it somewhere, so I whipped up a little carrier for her.

“It’s not a water bottle carrier, Mom. At camp they just call it a bottle carrier.”

Whatever. I made one of these awhile back and it came out kind of snug. I added generous seam allowances to this one and it’s a little big. Maybe if I make third one it will fit just right.

And yes, it matches her neck cooler. She’ll be super coordinated next year at the Kearney Cruise.

resources: I really did wing this, but not before checking out tutorials by Pink Chalk Studio and The Long Thread.

new (to me) tablecloth

tablecloth refashion

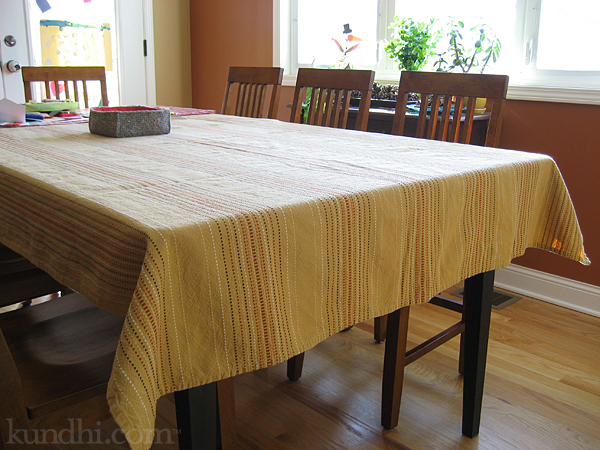
I’m starting with an after picture so you’ll see the pretty new tablecloth first. I’m a little bit embarrassed posting the before picture, but I guess when you publicly make a commitment to finishing up some long overdue projects, that’s what happens. In my defense, the chair at the end of the table usually covers up the orange tablecloth. Here it is:

tablecloth refashion

Some history: a few years ago we ordered a table base online and had a local guy make the top for us. Our plan was to stain it the same color as our cabinets. The stain gives me a headache, so it needs to be done outside. There aren’t a lot of good days for that with Nebraska’s cold winters and windy summers. I bought the red striped tablecloth to help protect the unfinished wood.

Then my daughter got to the drinking-milk-out-of-a-cup stage, followed by spilling-milk-on-the-table stage and I needed something to protect the wood better. The vinyl tablecloth I found was too big, but it matched our decor. It’s nice for messy group projects, like carving pumpkins or birthday parties. I figured I’d wait to hem it until I found a more permanent tablecloth.

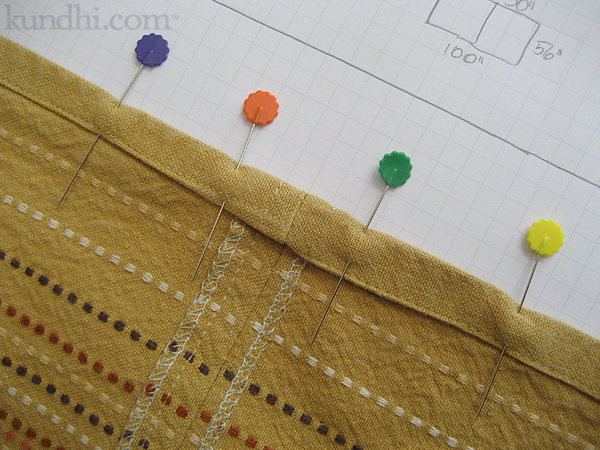
Fast forward to last week: I finally found the perfect tablecloth. Unfortunately it was too small, but fortunately there were two! I cut off the extra, serged the ends and unpicked the hems for a “seamless” seam.

tablecloth refashion

The extra fabric will become matching pillow cushion covers for the adjoining room. And the vinyl tablecloth finally got hemmed! I’m not sure what I’m going to do with the extra vinyl fabric. Any suggestions?

thrifted: original tablecloth was on clearance at Target, but all of the others are from local thrift stores.

wardrobe refashion: puppy nightshirt

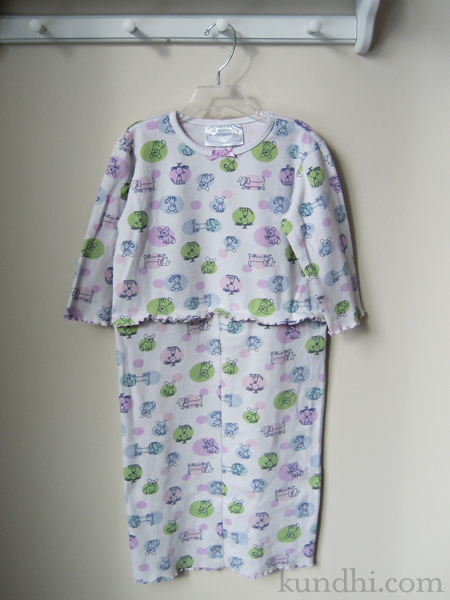
This nightshirt used to be a pair of pajamas. Repeated washings have caused them to shrink, but instead of getting smaller all over, they got shorter and wider. I tried to convince my daughter they were ready for the donate pile, but the “doggie pajamas are her most favorite.” She asked me if I could turn them into a nightshirt like her Mickey pajamas.

pajamas turned nightshirt

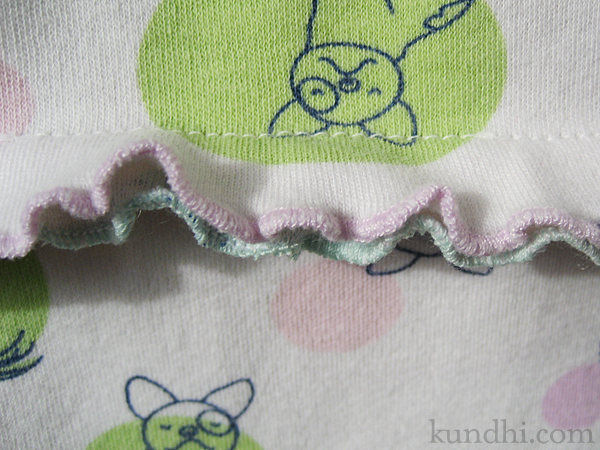
Since they were so wide, all I had to do was remove the elastic waistband, sew the pant legs into a tube, and attach them to the shirt. I added a rolled hem to the raw edge of the waist to match the shirt for a little more ruffle action: pink hem original, green hem mine.

pajamas turned nightshirt

technical note: I had a serious problem with skipping stitches on this project, no matter what my tension, regular or ball point needle, even different thread. When I switched to a muslin scrap the stitches were fine. I figured it must be the fabric so I tried putting a piece of paper tissue under the presser foot. It worked like a charm and the tissue tore away easily. I’m not sure where I first read this idea, but I’m glad I remembered it!

wardrobe refashion: I don’t think the life of these pajamas really need to be extended much longer. We’ve had them awhile and they are well loved. I’m curious how long they’ll last in their new form.

how to make mini race flags in 3 easy steps

race flag tutorial

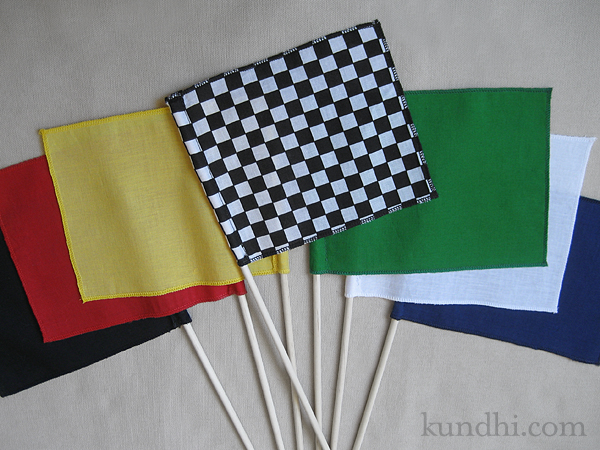
My daughter didn’t ask for many things this Christmas. I wasn’t surprised a race track was one of the few items on her list, but I wasn’t expecting a request for a set of racing flags. I figured they’d be easy to make, but they couldn’t look homemade. They were coming from Santa, after all. These would make great gifts for the little racing fans in your life — girls and boys alike.

You’ll need a serger for this project. I suggest making a few sets at once. The project itself is super easy, but changing the serger thread is a bit time consuming. It’s definitely not a last minute Christmas Eve project, ahem.

Materials
5″ x 7″ rectangles of various colored fabric (flag definitions here)
3/8″ x 12″ wood dowels
matching thread, three spools each
fray check

Notes
Thread: Those big grab bags of half-used spools of thread at the thrift store are perfect for these. You’ll need a lot of spools, but not a lot of thread.

Changing serger thread: I don’t re-thread my serger every time I change thread. Simply snip the original thread close to the spool and tie on a new spool. Then lift your presser foot to release the tensions and pull the threads through. Try not to run the knots through your tension wheels and be careful with the knot at the needle’s eye. You may have to re-thread the needle. Once new threads are through, drop your presser foot and start serging!

race flag tutorial

Step 1
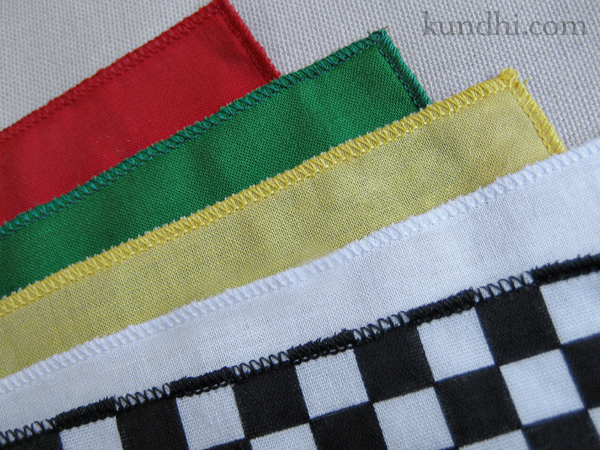
Serge all four sides of each rectangle with a rolled hem.

Step 2
Fold one shorter side over 1/2″ and press. Sew the top and side closed, stitching close to the rolled hem. Leave an opening at the bottom for the dowel.

Step 3
Trim ends. Secure the serged ends with Fray Check. Slide flag onto dowel.

storage: A drawstring bag made with the checkered flag fabric would be so cute for these! A mailing tube from the office supply store also works.

confession: I bought new, same brand fat quarters of fabric for this project. It almost killed me to do so, but my daughter is really enjoying the idea of Santa this year, so I caved. Normally I would have raided my fabric stash of scraps for this project. Next time for sure!