how to make a ruffle scarf in 3 easy steps

The other day I saw a woman wearing a cotton scarf that was layered and unfinished in the most beautiful way. She looked like she just walked off a catalog shoot. I’ve never been able to pull off that “I just threw it on and it looks perfectly ruffled” look, so I decided to design one that made it easy.

ruffle scarf tutorial

Step 1
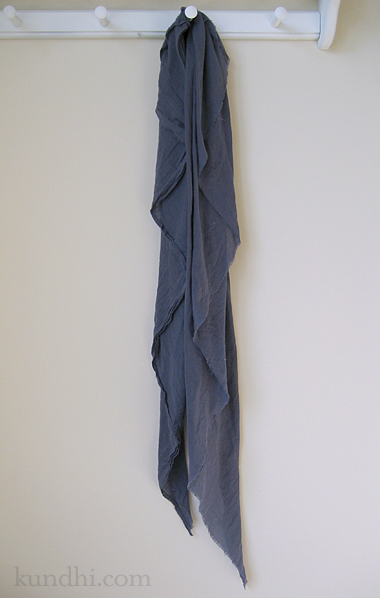
Cut a large triangle of fabric on the bias. I chose a lightweight cotton, but anything with a nice drape would work. (Flannel would be nice for Fall.) My piece measured 80 inches across the base and 32 inches high. Run it through the washer and dryer to fray the edges.

Step 2
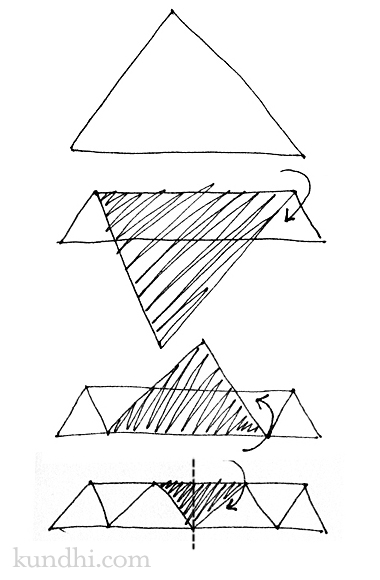
Fold the ruffles. I figured a diagram would be easiest to understand. I folded mine 8 times, but you don’t need to see that many steps to get the idea.

ruffle scarf tutorial

Step 3
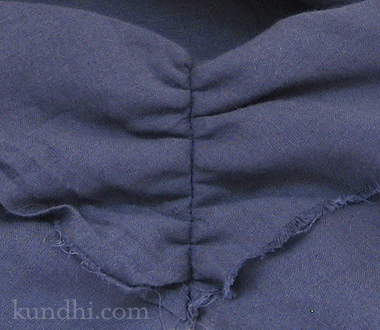
Stitch the ruffles in place. I didn’t back tack and pulled on the threads to create a little gather before I tied them off.

ruffle scarf tutorial

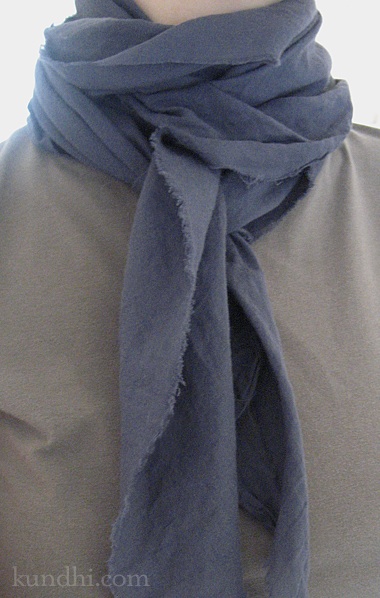
That’s it! You can wear it with the ruffles hanging down or wrap it around a few times with the ruffles facing out for that perfectly unfinished look.

ruffle scarf tutorial

tiny striped egg pattern

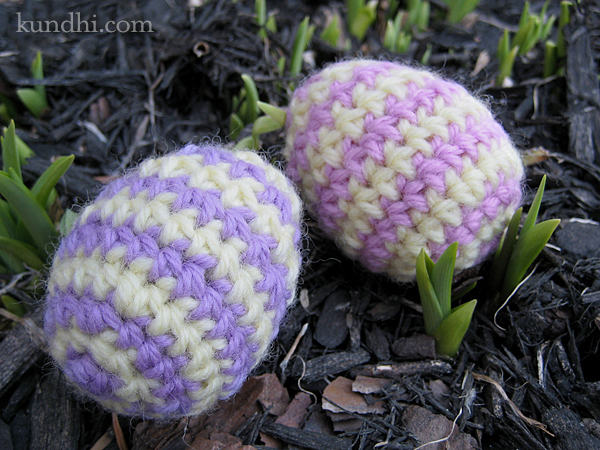
tiny crochet striped easter eggs

So here it is! After many eggs, I finally found the right hook/yarn combination that feels right. My first egg used a larger hook and Red Heart yarn. It was too big and looked a little lumpy. I finally settled on Plymouth Galway wool with a smaller hook. Both are labeled worsted weight, but the wool eggs seem less lumpy. Also, I decided on hdc instead of sc because I liked the width of the stripe better. I’m posting this in Ravelry. I can’t wait to see everyone’s eggs!

Tiny Striped Egg
worsted weight yarn
size D/3 (3.25mm) crochet hook
polyfil for stuffing
tapestry needle for weaving ends

ch: chain
hdc: half double crochet
hdcIncrease: half double crochet increase
hdcDecrease: half double crochet decrease
sl st: slip stitch

half double crochet increase: hdc twice in same stitch
half double crochet decrease: yarn over, hook through stitch, yarn over, pull through stitch, yarn over again, hook through next stitch, yarn over, pull through stitch, yarn over one more time, pull through all five loops

I carry the yarn up the inside with out breaking it for each stripe. Change colors at the slip stitch: hook through stitch, yarn over with new color, pull new yarn through stitch.

gauge: not important, but mine are about 1 1/2 x 2 1/4 inches finished

P=purple stripe, Y=yellow stripe

  • Make a magic ring.
  • R1 P: ch 2, hdc into loop 5 times, pull loop closed, join with sl st into second ch – 6 sts
  • R2 Y: ch 2, hdc in same st, hdcIncrease around, sl st into second ch – 12 sts
  • R3 P: ch 2, hdc in same st, hdc in next st, *hdcInc, hdc* around, sl st into second ch – 18 sts
  • R4 Y: ch 2, hdc in same st, hdc in next 2 sts, *hdcInc, hdc, hdc* around, sl st into second ch – 24 sts
  • R5 P: ch 2, hdc around, sl st into second chain – 24 sts
  • R6 Y: repeat R5
  • R7 P: ch 2, hdc, hdcDecrease, *hdc, hdc, hdcDecrease* around, sl st into second ch – 18 sts
  • R8 Y: ch 2, hdc around, sl st into second chain – 18 sts
  • R9 P: ch 2, hdcDecrease, *hdc, hdcDecrease* around, sl st into second ch – 12 sts
  • R8 Y: ch 2, hdc around, sl st into second chain – 12 sts
  • Stuff with polyfil
  • R10: hdcDecrease around, close up with tail, tie off both colors, bury ends inside with tapestry needle

tiny four-leaf clover pattern

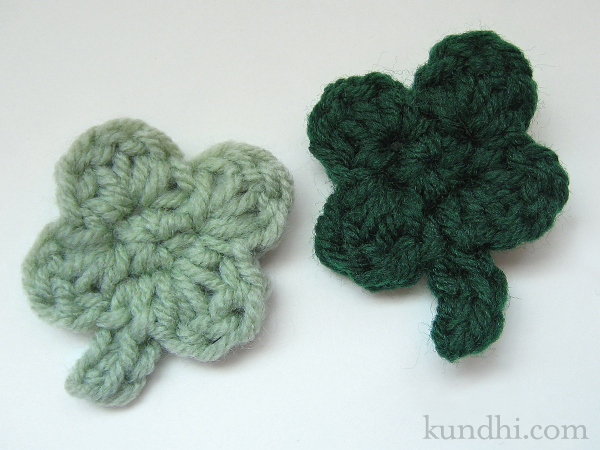
tiny crochet shamrock

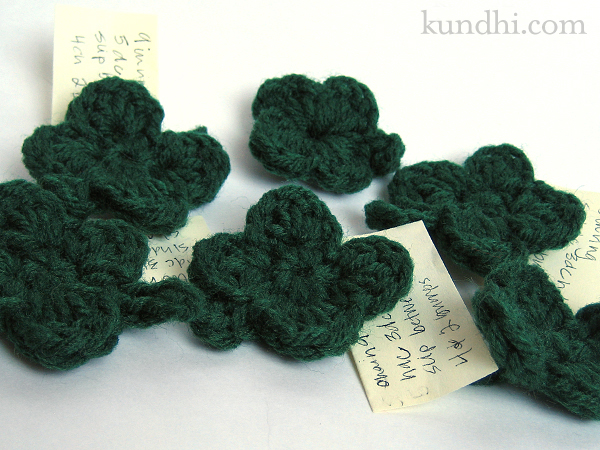
I had this idea. The top of my tiny crochet hearts kind of look like half of a four-leaf clover. What if I added two more leaves and a stem?

tiny crochet shamrock

After a few tries, I finally got it. Hope they bring you some good luck!

Tiny Four-Leaf Clover Pattern
worsted weight yarn
size G/5 (4.25mm) crochet hook
tapestry needle for weaving ends

dc: double crochet
hdc: half double crochet
sc: single crochet
sl st: slip stitch

gauge: not important, but mine are about 1 1/2 inches across

Make a magic ring.
R1: chain 1, sc into loop 5 times, pull loop closed, join with sl st (5 stitches)
R2: It might be easier to take this stitch by stitch:
— chain 1, hdc, 3dc, hdc in first stitch
— sl st into second stitch, hdc, 3dc, hdc in that same stitch
— sl st into third stitch, chain 4, sc in second and third bump from hook,
    sl st into third st again*
— hdc, 3dc, hdc in fourth stitch
— sl st into fifth stitch, hdc, 3dc, hdc in that same stitch
— sl st into first chain 1

*You’re going into the bumps on the back of the chain, not the stitches on the front of the chain.

Some folks were having trouble getting the V shape on the top of the heart, so I hope adding this chain 1 helps. I take the end, weave it in on the back toward the tail and then tie them tightly together.

tiny crochet heart pattern

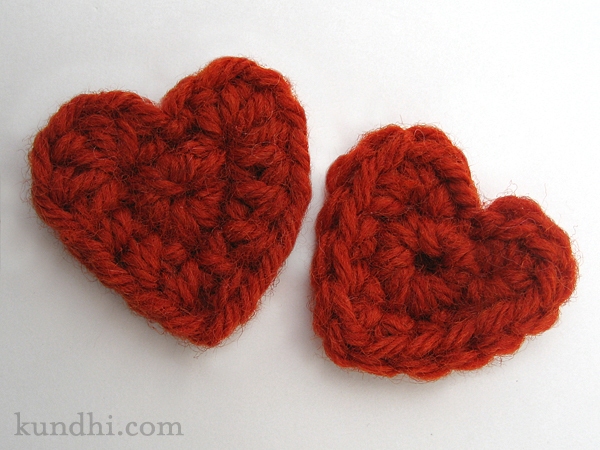
I wanted to make some really small hearts for Valentine’s Day crafts, but couldn’t find any patterns online that I liked. After a few tries, I came up with these little cuties.

tiny crochet hearts

Tiny Crochet Heart Pattern
worsted weight yarn
size F/5 (3.75mm) crochet hook
tapestry needle for weaving ends

hdc: half double crochet
sc: single crochet
sl st: slip stitch

gauge: not important, but mine are about 1 1/2 – 1 1/4 inches across

“Big” Tiny Heart (the one on the left)
Make a magic ring.
R1: chain 1, sc into loop 7 times, pull loop closed, join with sl st to chain 1
R2: sl st into 1st stitch, 5 hdc into second stitch, hdc in next two stitches, hdc then chain 1 and hdc again in the bottom stitch, hdc in next two stitches, 5 hdc into next stitch, sl st in original sl st.

Give the tail a little tug to help form the heart V at the top, tie knot, weave ends.

Give the bottom stitches a little tug to make the V point at the bottom.

“Small” Tiny Heart (the one on the right)
Repeat pattern, but replace sc for hdc.

i have this little sister lola…

Actually, I have this little “niece” in Florida. She just turned eight and I know she used to like Charlie and Lola when she was younger. We’ve just recently discovered Charlie and Lola. I checked out some paperbacks from the library, but my daughter’s favorite is this pop-up book from her “Aunt Lisa.”

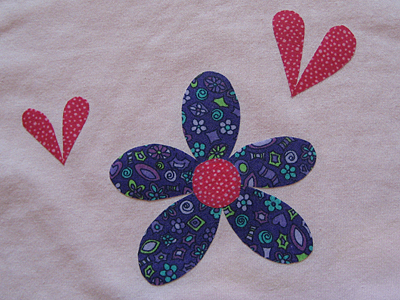
I made a Formula One t-shirt for my “nephew” last spring and wanted to do something similar for his sister. I absolutely adore Lauren Child’s illustration style, but was worried that it might be too young for a grown up eight-year-old. I decided to create my own applique flower and add two small Lola-like butterflies.

charlie and lola applique t-shirt

I really love how this turned out. I hope she does, too.

refashion: Scrap fabric and heat-n-bond is from my stash. You can download a pdf file of my flower pattern here.

how to sew a remote control pillow in five easy steps

I’m not sure why I’ve had pillows on my mind. Maybe because the sun has been hiding behind the clouds for too many days to count? Maybe it’s because I’ve been feeling under the weather? Maybe it’s because the holidays are fast approaching and I need some gift ideas for the guys in my life? Whatever the reason, I’ve been having fun. These are really easy. I know you’ll have fun, too.
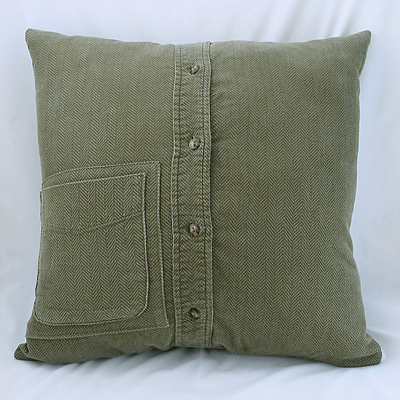
remote control pillow

Notes

  • Remote Control Pillow v 2.0 is for those who only have one tv remote or are using a universal remote for all of their equipment. If you need a multi-pocket pillow, check out my Remote Control Pillow v 1.0 pattern.
  • Most likely, your pocket will have to be flipped and moved to accommodate a remote control. If your shirt doesn’t have a pocket, you can easily make one out of the sleeve or a contrasting scrap fabric. Be creative! Try a denim pocket from a pair of jeans.
  • Some men’s shirts don’t have buttons past the belt line. You can take one from the collar or cuff and stitch it on the band.
  • If you are using a smaller shirt, simply use a smaller pillow form. I usually sew the cover 1″ smaller than the pillow form size so the final pillow will be nice and firm.
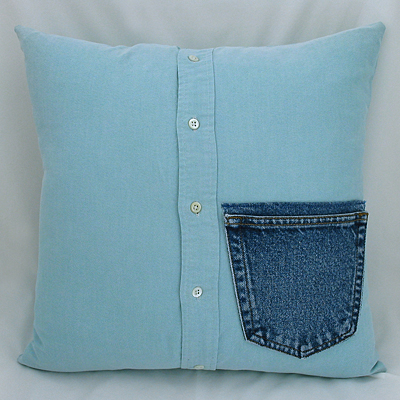
denim pocket men's shirt pillow

Materials
1 – large men’s button shirt with pocket
1 – 18″ pillowform
seam ripper
matching thread

Step 1
With the shirt buttoned, cut a 17 1/2″ square out of the front of the shirt. Cut another 17 1/2″ square out of the back of the shirt.

Step 2
Carefully remove the pocket using a seam ripper. Spritz shirt with water and steam press to close up any holes. Reposition the pocket and topstitch in place.

Optional Step 3
If your holes don’t close, if you accidentally rip your fabric, or you are using a shirt like corduroy and the nap won’t fluff back up, you’ll need a patch. Just cut a square from the sleeve and topstitch it over the original area.

Step 4
Lay the pieces together right sides together and sew around the whole square with a 1/4″ seam allowance. Make sure to undo one or two buttons before sewing so you can turn it right side out afterward.

Step 4
Clip your corners, turn right side out and press.

Step 5
Insert your pillow form and button it up!
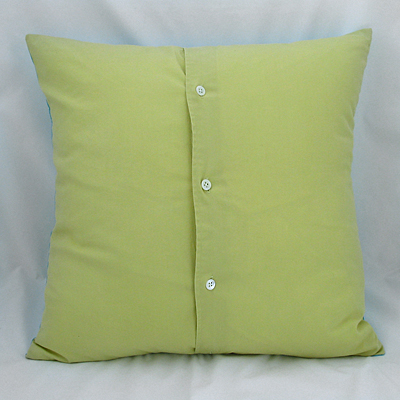
affordable decorative pillow button down shirt

This is an easy way to make decorative pillows, too. If you go to Goodwill on 99 cent day, this becomes a really affordable project. Plus, they organize their clothes by color, which makes it easy to find shirts that match your fabric. I used a little less than a fat quarter of fabric for the decorative pillow.
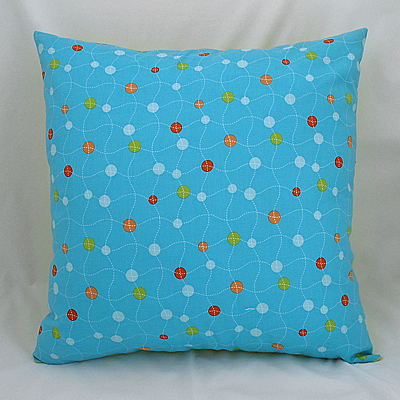
home decor pillow on a budget

recycle: Before you head out to the thrift store, check your own closet. All three of these shirts came from my husband. In fact, I have him trained now to ask me first before donating any of his clothes!
ghost of the past: crochet amigurumi pattern

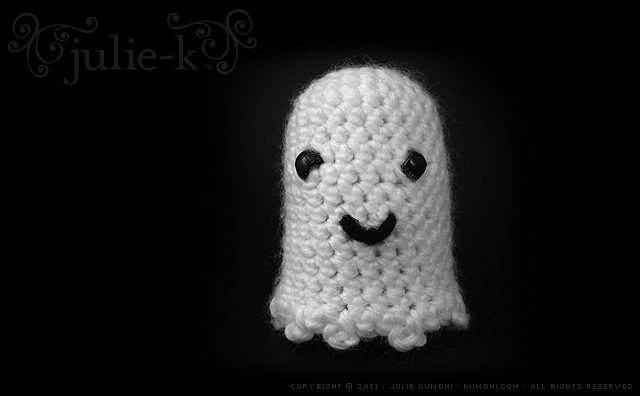
glow in the dark ghost

Tomorrow is the first day of October. Are you ready for Halloween? I posted this pattern on my personal website last year, but I have so many new readers over here, that I thought I’d share it again. I think it would be fun to make a big pile of these and string them on a garland!

Glow in the Dark Ghost with Picot Ruffles

Materials
glow in the dark yarn or any worsted weight white yarn
size G/6 (4mm) crochet hook
two black beads for eyes
black yarn for smile
tapestry needle for beads and weaving ends
optional: polyester fiberfil

sc: single crochet
sl st: slip stitch

R1: chain 2, sc 6 in second chain from hook
mark the beginning of your row, move your marker up on each completed row
R2: 2 sc in each stitch around (12 stitches)
R3: *sc 1, sc 2 in next stitch* around (18 stitches)
R4: *sc 2, sc 2 in next stitch* around (24 stitches)
R5-7: sc around
R8 : sc 9, sc with bead, sc 3, sc with bead, sc 10
R9-15: sc around
R16: *[sl st, chain 3, sl into same st] sc* around for picot edging

Tie off, sew on a little smile, and weave in your ends.

I didn’t crochet a base because of the picot ruffle. Not to say that it couldn’t be done. This is more decoration than a toy, so I stuffed it with fiberfil to give it shape, but it’s open on the bottom.

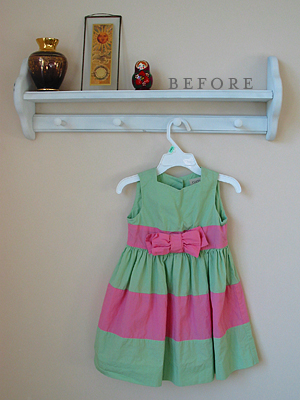
how to refashion a dress into a skirt
in five easy steps

Even though I wrote this tutorial for a kid’s size dress, you can do this with adult sizes, too. This is the same way I turned a shirt into a skirt.

My daughter and I both love this dress. She only wore it a few times last season because it was too big. This year it is too small. It probably would have fit her best when it was 20 degrees outside.

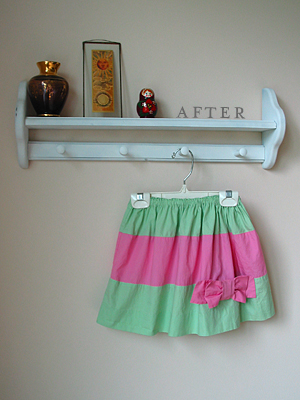
easy kids skirt tutorial

The other day she insisted on wearing it. (Yes, it was still hanging in her closet even though it was too small.) I let her try it on so she would see that the buttons could no longer be buttoned. While she had it on, I realized that it was just the top that was too small. The bottom fit just fine. Hmmm… what if I turned it into a skirt?

easy kids skirt pattern

Step 1
Cut off the bottom of the dress. If your daughter is as tall as mine, use a seam ripper. It takes longer, but she needs every bit of length I can save.

Step 2
Measure your daughter’s waist. Add an inch and then cut a piece of elastic. I used 3/8″ wide elastic.

Step 3
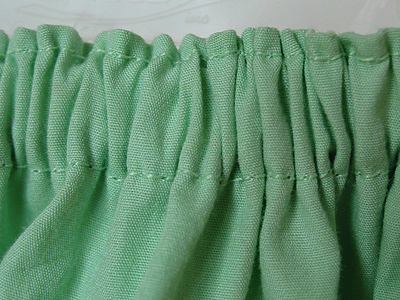
Fold the top edge down 1/4″ and press. Then fold 5/8″ and press.

easy kids skirt tutorial

Step 4
Sew the waist leaving an opening for the elastic. Edge stitch the top to help the elastic stay in place.

Step 5
Thread the elastic through the waist casing, sew elastic ends together with a 1/2″ seam allowance, and close up the waist.

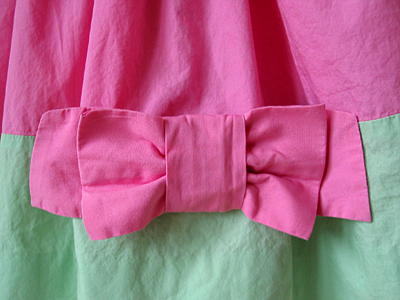
easy kids skirt pattern

My daughter was so excited to see her new skirt. She especially loves the bow. The original dress had a two inch hem. If she’s still in love with it next season, I guess I’ll be letting the hem down, too.

refashion: Sewing clothes is sometimes easier if you don’t start from scratch. Refashioning a favorite piece of clothing can make you happy, your budget happy and the earth happy.

Thanks to whipup.net for linking to my tutorial and welcome new readers! For more crafty updates, visit my Facebook page!

inspiration: anthropologie tank top

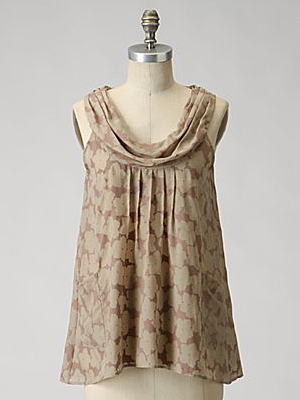
I was browsing through the Anthropologie website and saw this cute top.

anthropologie transparency cowlneck

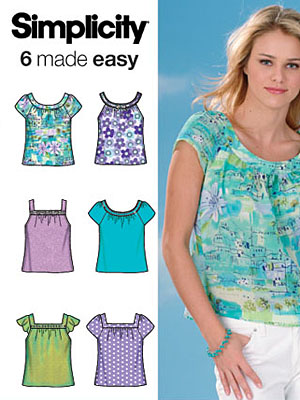
I immediately thought of a pattern I have in my stash. (View #2)

simplicity 4589

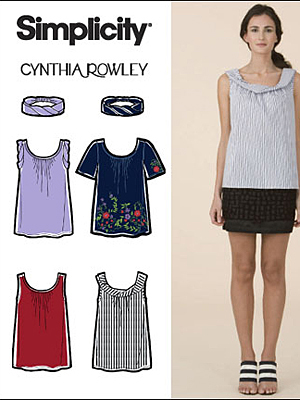
Then I thought of another one. (View #4)

simplicity 2593

Clearly I need to stop thinking so much and start doing. My list of potential and unfinished projects is getting much too long!