how your child can make wrapping paper in 3 easy steps

handmade eco-friendly wrapping paper

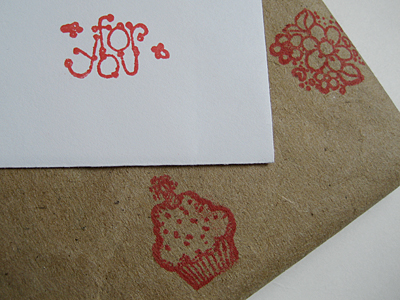
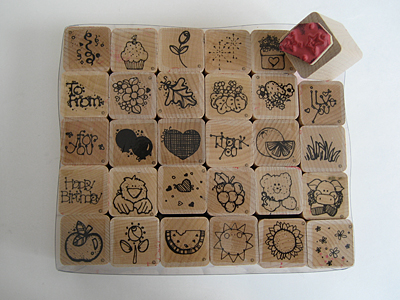
A few months ago I found these stamps while digging through the craft section at the thrift store. One of my daughter’s favorite things to do is stamp — anything and everything!

handmade eco-friendly wrapping paper

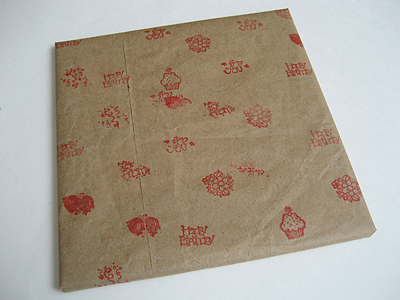
She already makes birthday cards for her friends by hand, and I thought it would be fun to have her make wrapping paper for the gifts, too. Fabric gift bags are great, but sometimes kids just need to rip paper.

I usually use kraft paper for this, but a paper bag works just as well.

Materials
kraft paper or paper bags
rubber stamps
washable ink stamp pads

Step 1
If using kraft paper off the roll, tape it to the table first so your child has a flat surface on which to stamp. If using a paper bag, cut it flat and use a low heat iron to smooth out the wrinkles. (They won’t disappear, but will flatten out.)

Step 2
Roll up your child’s sleeves. We’ve had elbows in the stamp pad many times, which is why washable ink is a good idea.

handmade eco-friendly wrapping paper

Step 3
Wrap the gift! If your child wants to help with this step, hold the paper and let her apply small pieces of tape.
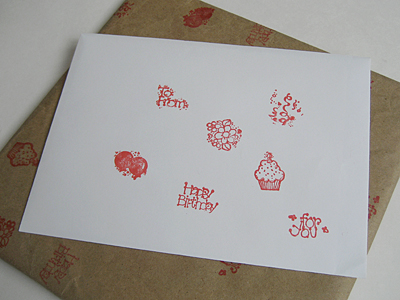
Bonus!
Have your child stamp the envelope to match the paper.

handmade eco-friendly wrapping paper

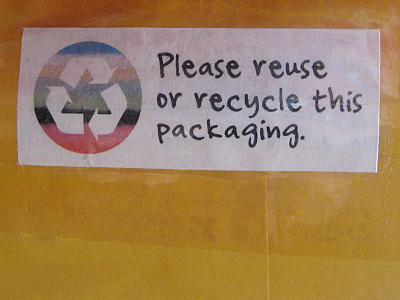
recycle: If you missed my post with the frightening statistics about wrapping paper, you should really check it out. I’m happy to say this is one resolution that I’ve had no problem keeping! (Price for the stamps: $4.)

handmade valentine’s day cards

handmade valentine's day card

My daughter’s preschool is having a valentine exchange tomorrow. Usually the rule for school treats is no candy, but this time they’ve made an exception: one small piece is allowed. I found this cute valentine flower on Martha’s website.

The first thing I did was trace and cut out some leaves. I gave them to my daughter to sign while I traced and cut out the hearts. After she went to bed, I added the “from:” to her leaves and glued the flowers. The next day, she helped me put in the lollipops.

Even though she’s too young to use scissors, I think my daughter had fun with this project. Signing her name to all of those leaves made her feel really involved.

stash: Paper from my never-ending stash of graphic design paper samples. Lollipops are always on hand around here. You never know when you need an emergency “treat.”

how to: recycled holiday card gift tags

recycled gift tags from holiday cards

Last year I saved a few of my favorite holiday cards for crafting. I planned to reuse the artwork to make new cards, but when I realized I didn’t have any cute gift tags in my stash, I started cutting! I began with 5 cards and ended with almost 30 gift tags in all shapes and sizes.

You’ll need:
-paper cutter
-embossing stylus, crochet hook or knitting needle for scoring
-ruler
-small hole punch

I just started slicing away without thinking too hard about the end result. Then I went back and sorted all of the bits.

  • Large rectangles were scored for fold-over tags. (boy pulling sled)
  • Borders made great matching flat tags. (red and cream stripes)
  • Images were cut in half to make coordinating card sets. (snow scene)
  • Die cuts made really fancy cards. (poinsettia)

Most cards are made out of heavy paper stock and need to be scored before you fold them or they will crack on the fold. If the surface is glittery, cover with a thin piece of paper before scoring.

The final step was to punch holes in the corners so they can easily be tied on to gift packages.

reuse and recycle: This little project didn’t take long and was so much fun. If you sent me a really cute card last year, thanks! You just might be getting it back on a gift this year.

reuse-or-recycle package labels

reuse recycle envelope labels

Usually I just handwrite this message on my packages, but sometimes I forget when I’m rushing to get things in the mail. Now I have labels! I printed them on the back of already used paper and just slip them under the packing tape. I suppose you could print stickers, but that’s too involved for me. Until I find a way to seal packages without packing tape, this will work just fine.

The image is a striped, felted sweater. I’m thinking of making some with holly leaves and berries for the holidays.

resource: I also made a template for you! Please download it and use it often!

glue stick collages

I’m sure I’m not the only one who needs a little time alone with my knitting needles or sewing machine (or work!). I’m always trying to find non-TV related activities for my daughter so I can get a little bit of work done. The things that have kept her most occupied are crayons, paints and stickers. A lot of times she will sit and “read” books or get absorbed in her train engines.

Lately, it’s been hard to keep her occupied. She always wants to know what I’m doing—always wants to help out (which is sweet, but not always helpful). Today I got almost two hours of productive time. Want to know how? (OK, the title of this post gives it away.) My daughter has discovered the glue stick.

glue stick halloween collage

You know how I say nothing is safe if it fits under my presser foot? Well, not much is safe from my daughter if she can glue stick it to a piece of paper.

martha stewart living magazine

The images are from Martha Stewart’s Living, last year’s Halloween edition.

glue stick magazine on poster board

We have big plans for future collages. Thanksgiving and Christmas themes, animals, shapes, letters and numbers…the possibilities are endless.

magazine collage

Look, Mom! The owl and skeleton are holding hands!

I remember my friend Barbara telling me how she spent her evenings cutting up National Geographic magazines so her granddaughter could make collages. Such a brilliant and simple idea. I highly recommend it!

recycle: You will be amazed at what you can find in your recycle bin for this project. Don’t overlook catalogs and non-crafty magazines. Pay close attention to ads. Tip: for maximum productivity, cut the pictures out the night before.